PlatformIO
Installation
There are 2 ways of working with PlatformIO:
- PlatformIO IDE, which integrates with editors such as VS-Codium.
- PlatformIO Core (CLI)
To install any of them, follow the corresponding steps.
In this documentation we use VS Codium, a telemetry-free, open-source version of VS Code. It offers the same powerful features without concerns about data privacy or licensing. However, this tutorial can also be followed with VS Code.
- Make sure you have VS Codium properly installed. If you do not, you can download them from their website: https://vscodium.com/.
- Download the C/C++ Microsoft extension for your operating system (use the Download Extension button on the right column of the page).
- Install it in VS Codium by going to Extensions on the left bar > ... > Install from VSIX... and choosing the downloaded file.
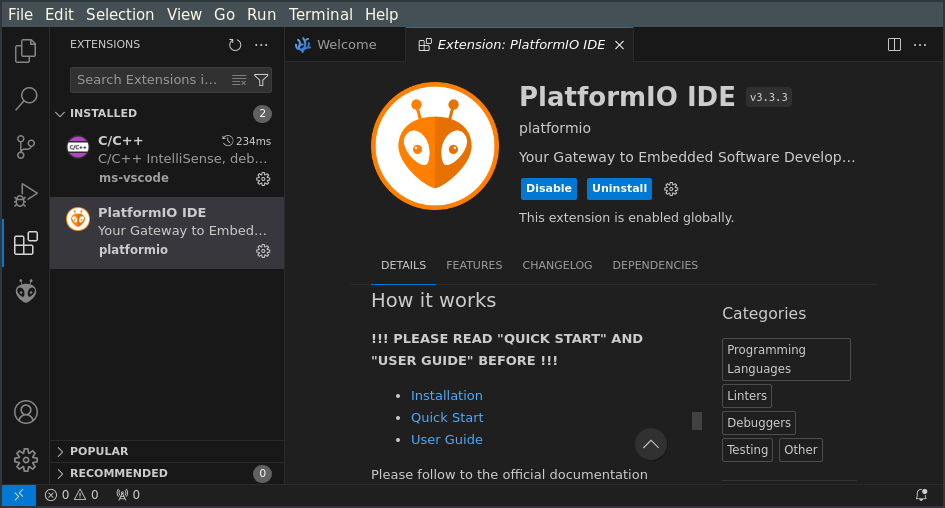
- Following the same procedure, download and install the PlatformIO IDE extension.
- Only on Linux, install udev rules for PlatformIO supported boards/devices: 99-platformio-udev.rules
Starting a Project
This tutorial introduces you to the basics of PlatformIO IDE, showing how to create a simple project for an Industrial Shields Arduino PLC.
- Open VS Codium and press the PlatformIO: Home on the bottom bar. Then click New Project, choose a name and select any board, as we will be manually setting the board later.
- Modify the "platformio.ini" file so it has the following contents:
[env]
platform_packages = framework-industrialshields-avr@https://apps.industrialshields.com/main/arduino/boards/industrialshields-boards-avr-1.1.42.tar.bz2

[env:board]
platform = https://github.com/Industrial-Shields/platform-industrialshields-avr.git
board = mduinoplc_21+
framework=arduino - On the same file modify the following fields according to your PLC:
- Platform_packages: this link points to the repository where we host our boards package. See that at the end of the link there is the version, "1.1.42". This is the first available version supporting PlatformIO. Subsequent versions can be found here.
- Board: the PLC model being used. All the available options can be seen in our GitHub.
- Platform_packages: this link points to the repository where we host our boards package. See that at the end of the link there is the version, "1.1.42". This is the first available version supporting PlatformIO. Subsequent versions can be found here.
- Modify the main.cpp in the src folder, where the main program is located. For example, to alternate the value on a digital output:
#include <Arduino.h>


#if defined(PIN_R1)
#define OUTPUT_PIN R1
#elif defined(PIN_R0_1)
#define OUTPUT_PIN R0_1
#elif defined(PIN_Q0_1)
#define OUTPUT_PIN Q0_1
#endif

void setup() {
    pinMode(OUTPUT_PIN, OUTPUT);
    Serial.begin(115200);

    Serial.println("Hello World");
}

void loop() {
    digitalWrite(OUTPUT_PIN, HIGH);
    delay(1000);
    digitalWrite(OUTPUT_PIN, LOW);
    delay(1000);
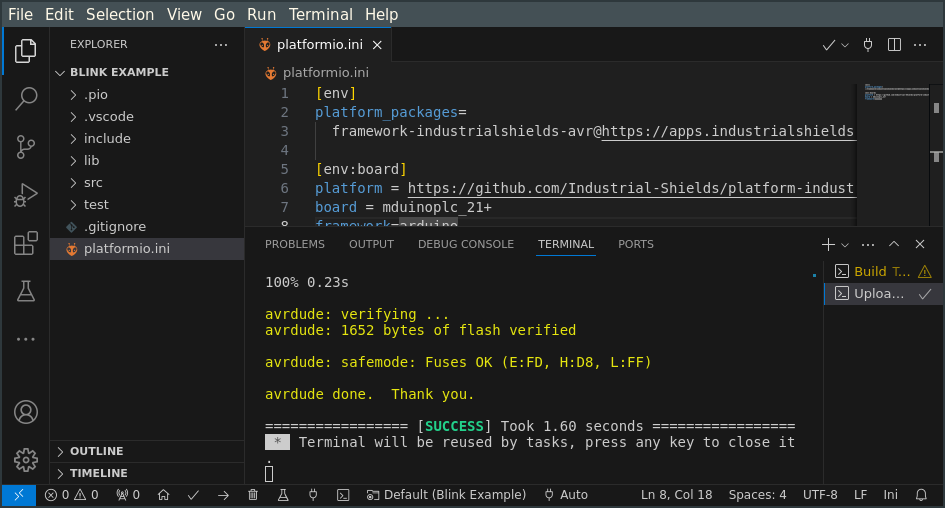
} - On the bottom bar, there are the PlatformIO Build and Upload buttons, which can be used to compile the code and program the PLC, respectively. Press the Upload button and PlatformIO will autodetect the connected board and program it. Should you need to, there is also a Set upload port button to manually set the port of the device being used.
For more information about PlatformIO, check out the official documentation.
Rating
There are no comments for now.
to be the first to leave a comment.