LoRa
LoRa (Long Range) is a wireless communication technology designed for long-distance, low-power communication, primarily used in Internet of Things (IoT) applications. LoRa operates on unlicensed radio frequency bands and allows devices to send small amounts of data over distances of several kilometers while consuming minimal energy.
This pages focuses on plain LoRa communication, and the necessary steps to properly use it on the Arduino based PLCs. If you are looking for an example on how to use LoRaWAN, check How to work with LoRaWAN and a PLC controller.
LoRa is an optional communication. Only the M-Duino and Ardbox PLCs with the additional communication board can use it.
Hardware
The Arduino based PLCs from Industrial Shields support LoRa for Europe, Asia and North America, featuring a RFM9X5W board. The supported bands are 868MHz and 915MHz, used in Europe and America respectively.
In order to use the LoRa, the DIP switches need to be properly configured.
DIP Switches
Locate the switches located on the left zone of the PLC and make sure they are in the right position (by default, they are already set for LoRa):
- Switch 3 (bottom) to OFF to enable LoRa.
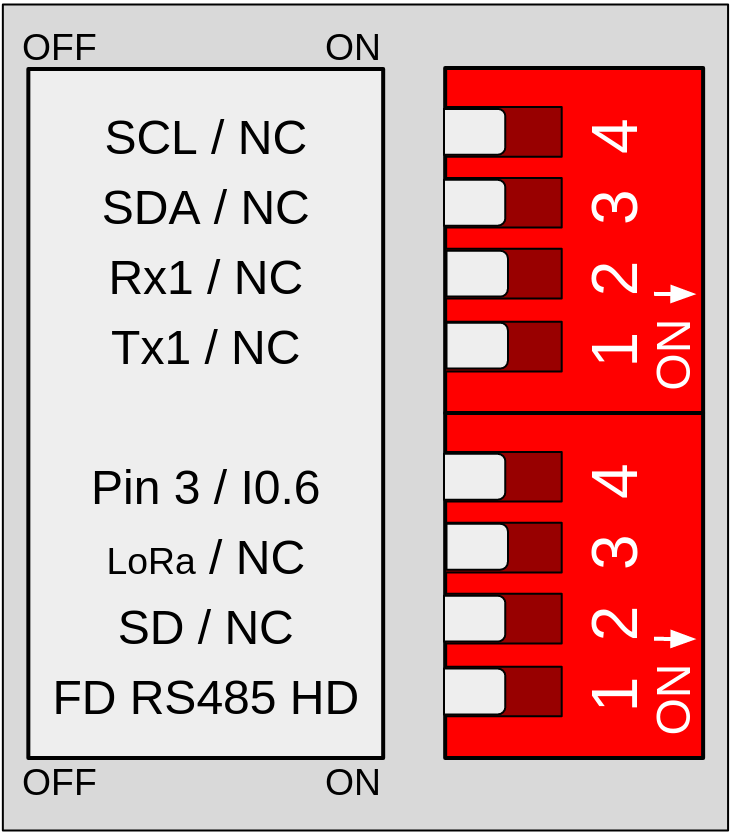
Left switch
Configure the switch 1 and switch 2 to OFF to enable the communication between the LoRa module and the Arduino board.
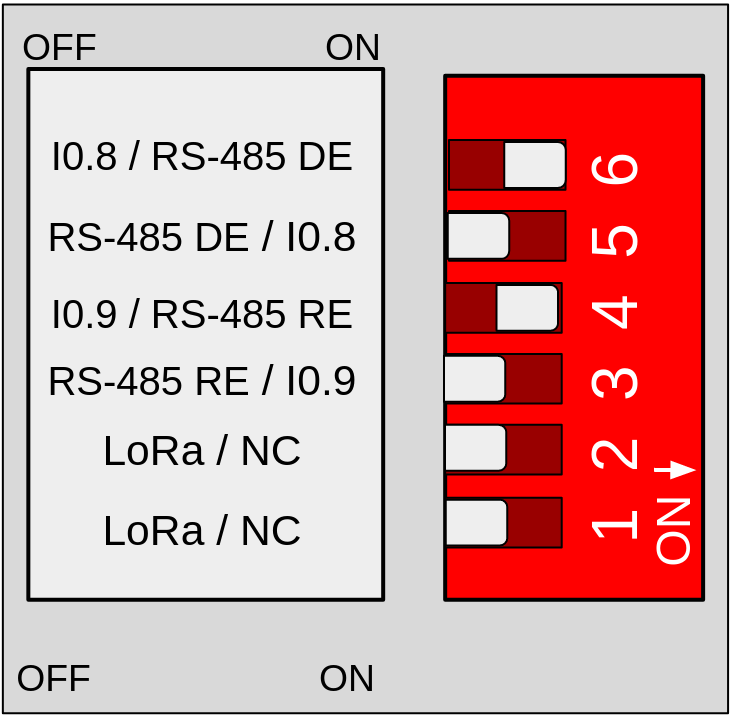
Right switch
Configure the switch 3 (Bottom) and switch 4 (Bottom) to OFF to enable the communication between the LoRa module and the Arduino board.
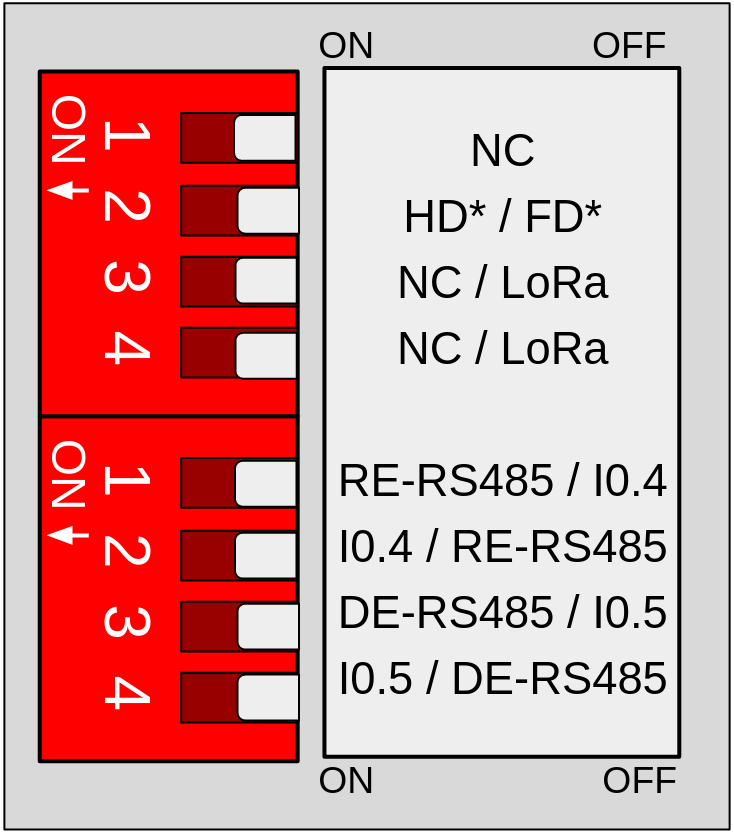
Locate the switches located on the left zone of the PLC and make sure they are in the right position (by default, they are already set for GPRS):
- Switch 1 (top) to OFF to enable GPRS.
- Switch 2 (top) to OFF to enable GPRS.
- Switch 3 (bottom) to OFF to enable GPRS RST.
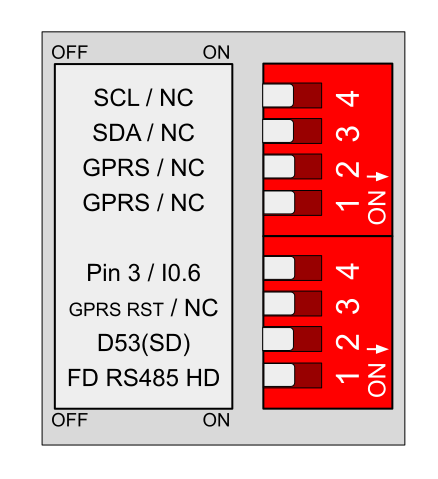
Locate the switches located on the left zone of the PLC and make sure they are in the right position (by default, they are already set for LoRa):
- Switch 1 to OFF to enable LoRa.
- Switch 2 to OFF to enable LoRa.
Locate the switches located on the right zone of the PLC and make sure they are in the right position (by default, they are already set for GPRS):
- Switch 4 (top) to OFF to enable GPRS RST.
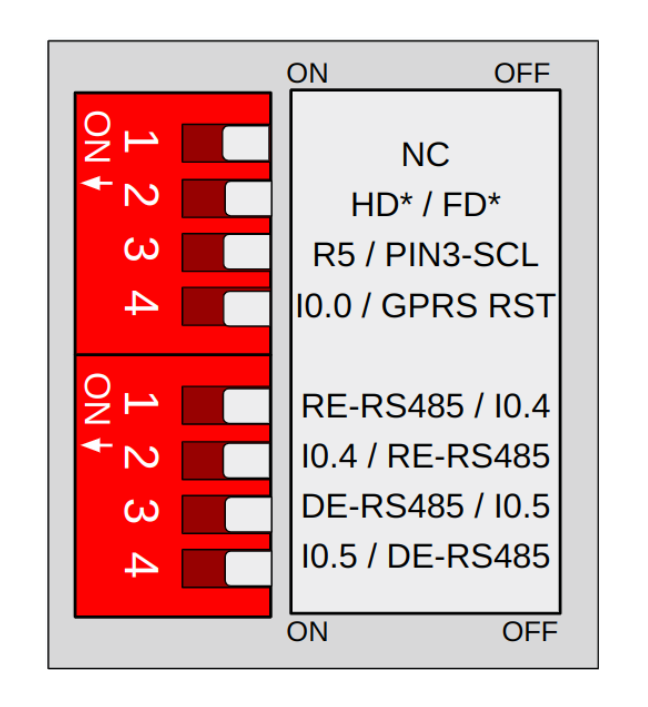
Locate the switches located on the right zone of the PLC and make sure they are in the right position (by default, they are already set for LoRa):
- Switch 3 (top) to OFF to enable LoRa.
- Switch 4 (top) to OFF to enable LoRa.
Remember to properly power the PLC with a 12-24V power supply.
Software
The LoRa in the Arduino PLCs can be used with the "LoRa" library. To properly configure it, follow the steps:
- Select the corresponding LoRa board: Tools > Board > Industrial Shields AVR Boards > Ardbox/M-duino LoRa family.
- Select your model on Tools > Model
- Select the port used at Tools > Port.
- Open the LoRa examples found on File > Examples > LoRa.
There are 2 basic examples available:
- The Receive example sets up a LoRa module for wireless communication at 868.0MHz. It initializes the module and continuously listens for incoming data packets. When a packet is received, it prints the received value to the serial monitor for debugging purposes.
- The Send example sets up a LoRa module for wireless communication at 868.0MHz. It initializes the module and then continuously sends a counter value as a data packet every 5 seconds. After sending each packet, it increments the counter and prints debug messages to the serial monitor.
API Reference
Description:
Initializes the LoRa module.
Syntax:
LoRa.begin();
Parameters:
None
Return Values:
Returns true if the initialization was successful; otherwise, returns false.
Description:
Sets the working frequency of the LoRa module.
Syntax:
LoRa.setFrequency(frequency);
Parameters:
- frequency: The frequency to set for the LoRa module, in MHz.
Return Values:
Returns true if the frequency was set successfully; otherwise, returns false.
Description:
Checks if there is an incoming packet available.
Syntax:
LoRa.available();
Parameters:
None.
Return Values:
Returns true if there is an incoming packet available; otherwise, returns false.
Description:
Receives a packet and stores the payload in the provided buffer.
Syntax:
LoRa.recv(buf, len);
Parameters:
- buf: Pointer to the buffer where the payload will be stored.
- len: Pointer to the length of the buffer. This will be updated with the actual length of the received payload.
Return Values:
Returns true if the packet was received successfully; otherwise, returns false.
Description:
Sends a packet with the provided payload.
Syntax:
LoRa.send(buf, len);
Parameters:
- buf: Pointer to the buffer containing the payload to be sent.
- len: Length of the payload to be sent.
Return Values:
Nothing.
Description:
Waits until the packet is completely sent.
Syntax:
LoRa.waitPacketSent();
Parameters:
None.
Return Values:
Nothing.
There are no comments for now.
to be the first to leave a comment.