Getting started: access, network, Wi-Fi, OS image and UPS
Lesson 0: First steps with a Raspberry PLC
Before connecting sensors or writing programs, you need to reach the controller, give it a safe network configuration and know how to restore it. This lesson takes you from a PLC out of the box to a session over SSH, a working network, a clean operating system image and a configured shutdown on power loss.
By the end of this lesson you will be able to:
- Access the Raspberry PLC with a monitor or over SSH, from Linux and Windows.
- Use its default IP addresses and secure the first login.
- Move around the command line with the essential bash commands.
- Connect the PLC to Wi-Fi with
raspi-configornmcli. - Flash a fresh Industrial Shields image on the SD card.
- Run your own commands when the power fails, using the UPS shield.
1. Accessing the Raspberry PLC
There are two ways to access the PLC:
- Micro HDMI: connect a monitor or TV to get image and audio, and use a keyboard and mouse in the USB ports.
- SSH: Secure Shell is an encrypted protocol that gives you the command line of the PLC from another computer. It is the normal way to work with a PLC installed in a cabinet.
1.1 Micro HDMI
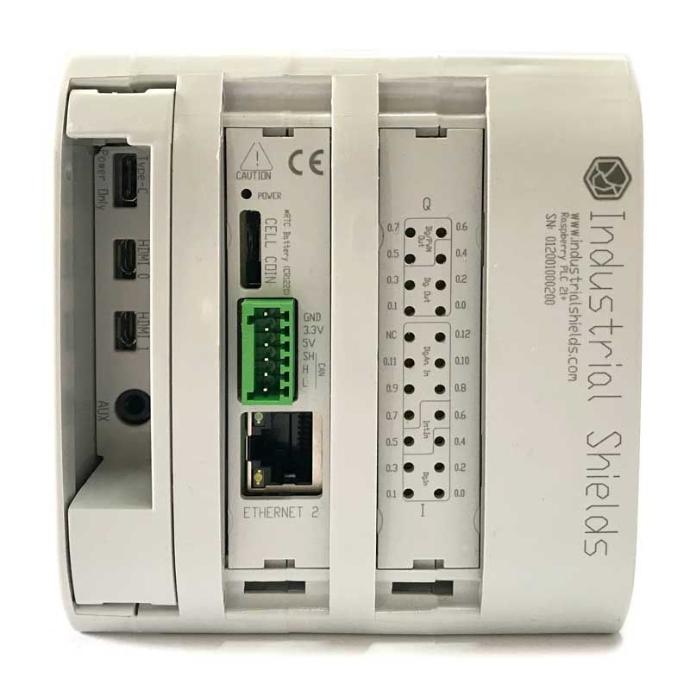
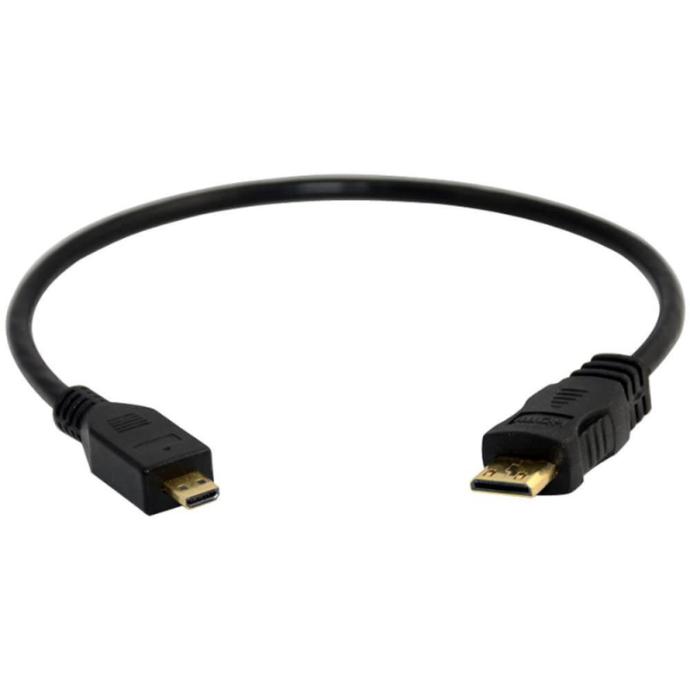
The Raspberry Pi 4 has two micro HDMI ports on the upper side of the Raspberry PLC. You need a micro HDMI to HDMI cable. When the PLC powers on with the cable connected, the image appears on the monitor automatically. Use the USB ports on the side for a keyboard, a mouse and other peripherals.
1.2 SSH
SSH needs a network connection between your computer and the PLC. The simplest ways are to connect both to the same LAN (by Wi-Fi or Ethernet to the router), or to connect the PLC directly to the PC with an Ethernet cable. The PLC comes with a default static IP address on each Ethernet port:
- Side Ethernet port (Ethernet 0):
10.10.10.20/24 - Top Ethernet port (Ethernet 1):
10.10.11.20/24
If you flashed a new image or you do not know the address, you can find it in two ways:
- With a monitor connected, run
hostname -I. The PLC can show several addresses, one per interface. - From a PC, scan the network with
nmap(available for Linux and also for Windows, download):nmap -sn 192.168.1.0/24, adjusting the subnet to your network.
SSH is enabled by default in our images. If it is not, enable it with sudo raspi-config → Interface Options → SSH → Yes.
Secure the first login. Our images ship with the user pi and the password raspberry, which everyone knows. The first thing to do on every PLC is to change the password with passwd. For production, use SSH keys (ssh-copy-id pi@<ip>) and then disable password login in /etc/ssh/sshd_config.
1.2.1 GNU/Linux
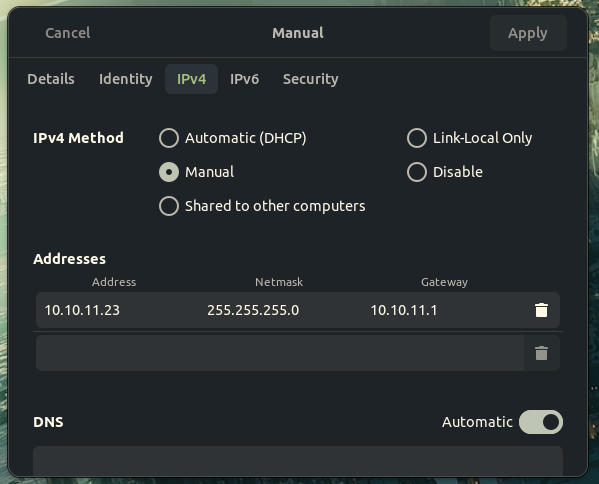
First give your computer an IP address in the same range as the PLC port you use: for Ethernet 0 use the 10.10.10.0/24 range (for example 10.10.10.30); for Ethernet 1 use 10.10.11.0/24 (for example 10.10.11.30). On Gnome desktops use the settings app; to do it from the command line, see this post.
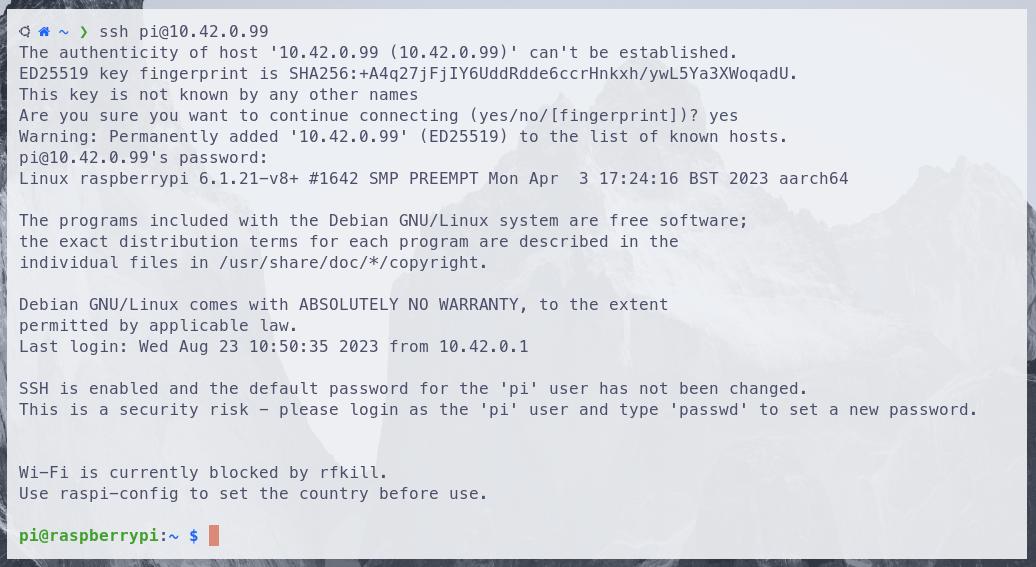
Then open the session with ssh [user]@[ip address], for example:
ssh [email protected]It asks for the password before starting the session.
1.2.2 Windows
Connect the PLC to the computer with an Ethernet cable. Open Command Prompt or PowerShell and run ipconfig to see the current network configuration:
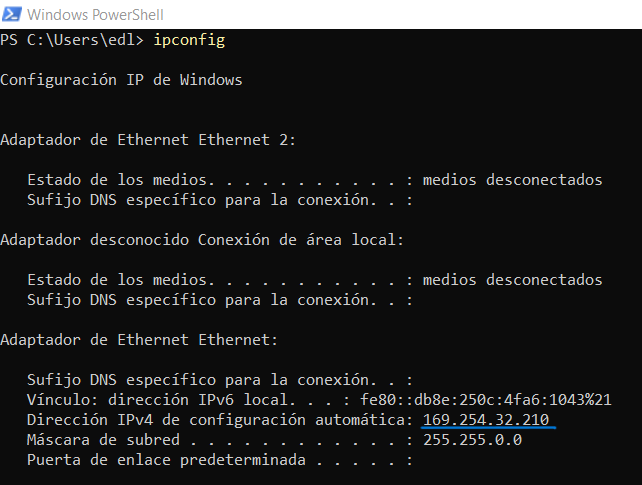
The subnet assigned by DHCP does not help, because the PLC has a static address: 10.10.10.20 on the side port (network 10.10.10.0/24) or 10.10.11.20 on the top port (network 10.10.11.0/24). Open Network and Internet > Ethernet in the Windows settings:
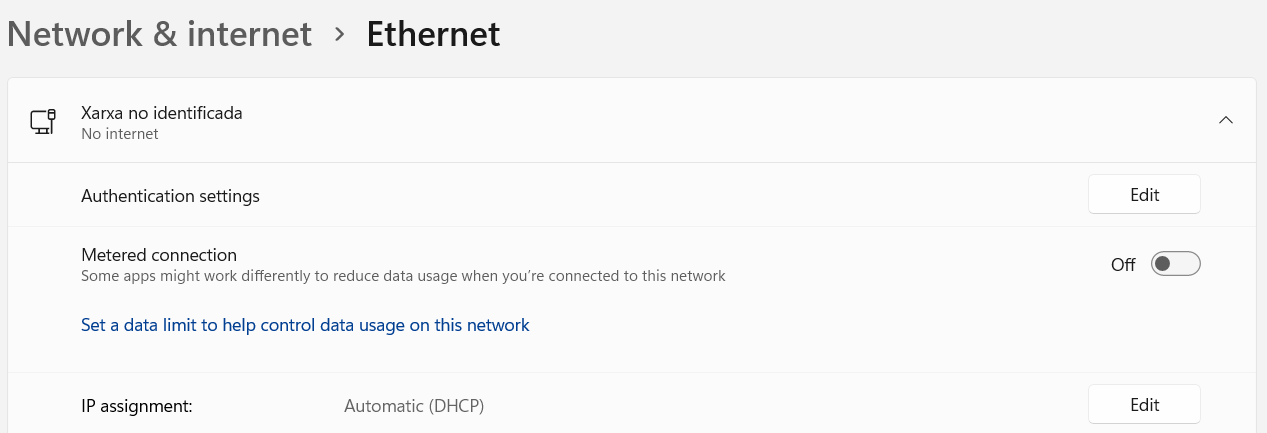
If it was never changed, the IP assignment is automatic (DHCP). Click edit and switch to Manual:
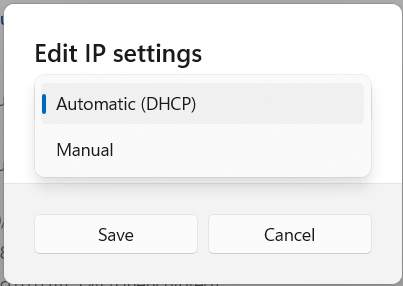
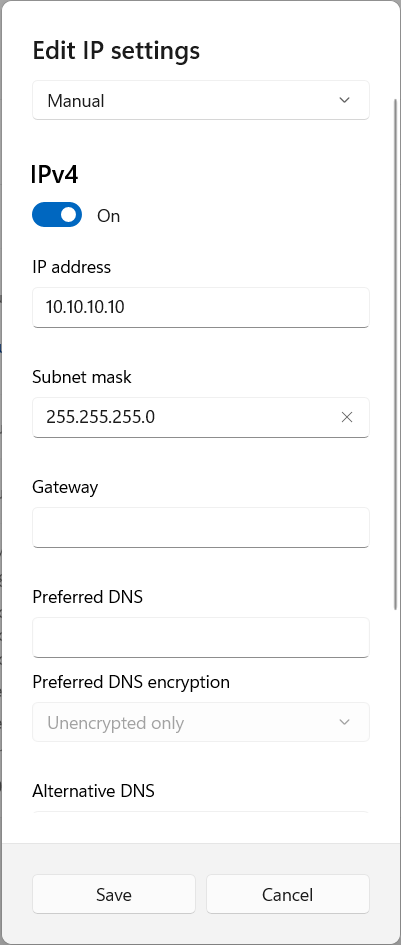
Enable IPv4, set an IP address in the PLC network (for example 10.10.10.10 for the side port) and the subnet mask 255.255.255.0, then save:
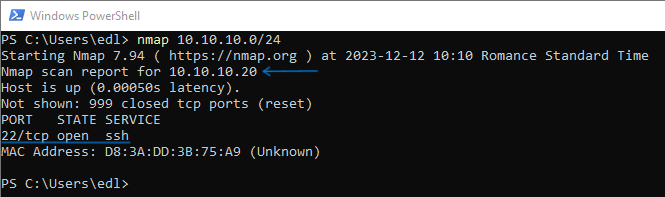
Check that the PLC answers with nmap 10.10.10.0/24. You should see the device 10.10.10.20 with SSH open on port 22:
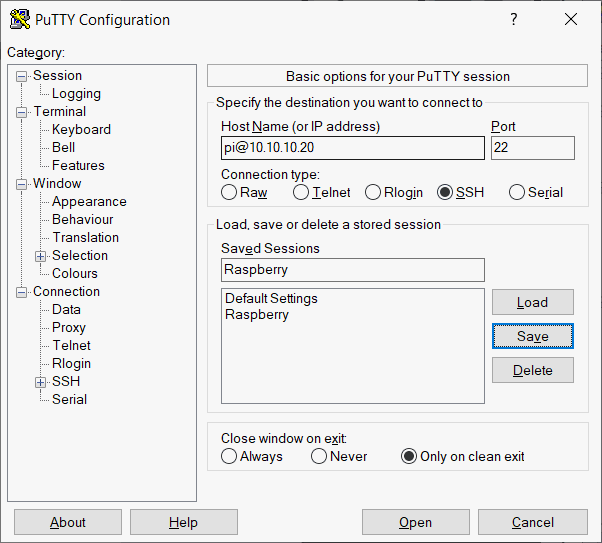
Windows 10 and 11 include an SSH client, so ssh [email protected] also works in PowerShell. If you prefer a graphical client, use PuTTY (free and open source, download). In the window set Host Name to the IP of the PLC, Port to 22 and Connection type to SSH, and click Open. Enter the user and password when asked.
2. Introduction to the command line (bash)
Once connected, you work in the command line, the most powerful tool to control the PLC. These are the basic concepts.
2.1 Paths
Everything you do happens in a location of the file system, the current working directory, usually shown by the prompt. In this prompt we are in ~/test:
pi@raspberrypi:~/test $There are two types of paths:
- Absolute paths start at the root directory (
/), for example/home/user/Documents/file.txt. - Relative paths start at the current directory. If you are in
/home/user,Documents/file.txtpoints to/home/user/Documents/file.txt.
Some special directories are very useful: . is the current directory, .. the parent directory and ~ the home directory of the user.
2.2 Essential commands
cd: change directory, for examplecd ~/test.ls: list the content of a directory.mkdirandrmdir: create and remove (empty) directories, for examplemkdir ~/new.rm: remove files; the deleted files are not recoverable. Userm -r directoryto remove a directory and its content.cp: copy files (cp file1.txt file1copy.txt) or directories (cp -r source destination).mv: move or rename (mv oldname newname).touch: create an empty file, or update the timestamp of an existing one.cat: show the content of a text file in the terminal.man: show the manual page of a command, for exampleman ls(arrow keys to move,qto exit).apropos: find the command for an action. For example,apropos renamelistsmv,renameand others.sudo: run a command with administrator rights. Use it only when needed.journalctl -f: follow the system log, the first place to look when a service fails.
3. Connecting to Wi-Fi
The Raspberry PLC supports Wi-Fi at 2.4 GHz and 5 GHz. It is practical for commissioning and for non-critical data; for control traffic, prefer Ethernet. You can configure it from the command line in two ways.
3.1 With raspi-config
- Run
sudo raspi-config. - Go to System Options → Wireless LAN.
- Enter the SSID and the password of the network.
The PLC connects automatically.
3.2 With nmcli
Current images (Raspberry Pi OS Bookworm) manage the network with NetworkManager, so editing wpa_supplicant.conf by hand no longer applies. Use nmcli:
sudo nmcli device wifi list
sudo nmcli device wifi connect "NETWORK SSID" password "NETWORK PASSWORD"
nmcli connection show
The connection is saved and comes back after a reboot. Set the Wi-Fi country of the PLC (sudo raspi-config → Localisation Options → WLAN Country) so the right channels are used. If you work with an older image based on Bullseye, the configuration is in /etc/wpa_supplicant/wpa_supplicant.conf.
4. Installing a new Raspberry Pi image
If the system does not work properly, or you want to return the PLC to the factory state, you can flash a new image. The OS images with our dependencies already installed are in our repository: apps.industrialshields.com/main/rpi/images/RPI_PLC/. The default version is Bookworm 64-bit (headless), and there is also a desktop version. You need a PC with an SD slot (or a micro-SD adapter).
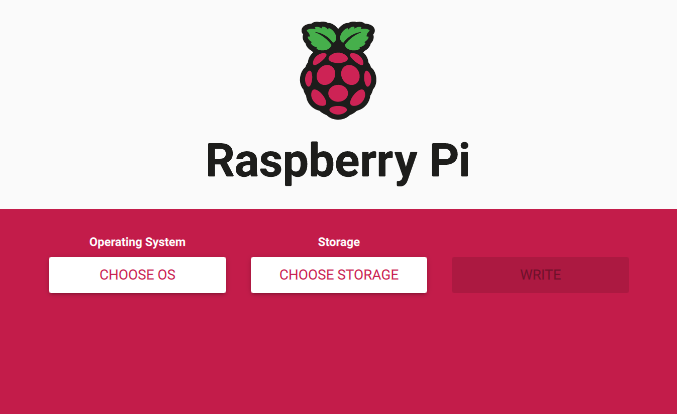
- Download and install the Raspberry Pi Imager (Windows, GNU/Linux and macOS) and run it.
- Choose the OS: select Use custom and pick the image downloaded from our repository.
- Choose the storage: connect the micro-SD card of the PLC to the PC and select it.
- Press Write and wait for the process to finish.
- Close the program, remove the SD card and insert it in the Raspberry PLC.
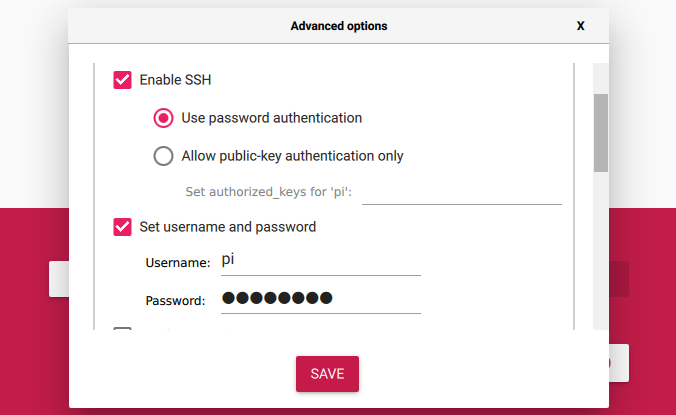
The PLC now runs a new image with the Industrial Shields dependencies in place, such as the UPS support and the I/O library tests. Remember to change the default password again.
5. UPS functionality
The Raspberry PLC includes a UPS (uninterruptible power supply) shield that provides 5 seconds of energy when the power is cut. That time lets the PLC shut down properly, avoiding data loss and SD card corruption. The rpishutdown service, installed with the image, controls this function.
The service can also run your own commands when it detects a power cut, before the final shutdown. The available time is 5 seconds at most, so keep them short, and note that they cannot depend on the external power (for example, they cannot enable an output). Typical uses are to save a counter or a last state to disk, or to send a last MQTT message.
- Go to the hooks directory (create it first if it does not exist):
sudo mkdir -p /etc/rpishutdown/hooks cd /etc/rpishutdown/hooks - Create a file called exactly
pre-poweroff, with no extension:sudo touch pre-poweroff - Write the commands inside. The first line must be a shebang with the interpreter, for example
#!/usr/bin/env bashfor a bash script (it can also be Python, and so on). - Give it execution permission:
sudo chmod ugo+x pre-poweroff
From now on, your PLC runs your commands whenever the power fails.
Next step
Your PLC is reachable, secured and recoverable. In the next lesson you test its communication interfaces. Meanwhile, explore the Raspberry PLC range at www.industrialshields.com.
There are no comments for now.
to be the first to leave a comment.