Lesson 8. Log PLC data in SQLite
#8 Using SQLite DataBase with Node-RED
Introduction
SQLite is a language library C based that implements SQL database engine. It’s small, fast, self-contained, high-reliability and full-featured. Apart from that it is based on open source and it’s the most used database in the world.
In this chapter we will focus our efforts to explain how to implement a database using SQLite with NodeRED.

Installation
Type in your terminal:
# Requires Node.js 20 or 22 LTS (npm included)
# Or from the editor: Menu > Manage palette > Install
cd ~/.node-red
npm install node-red-node-sqlite
Once we have the library installed in our NodeRED we are able to use their blocks on it. Another useful tool that we recommend to use is DB Browser for SQLite. There are distributions for the most popular OS.
Example
Before starting with the example it's important to check how SQLite works. If it's your first time using SQLite take a look on their website.
Before introducing data to the database we must create it. To create a table we just have to execute these code:
CREATE TABLE IF NOT EXISTS log(time INT PRIMARY KEY, value INT)In order to execute these code we must add the main SQLite block to our workflow. We will have to edit the block and create the database. Clincking, inside the block, on the edit button next to the database name we will create a new file where our database will be placed. In our case we have created the Chapter8_SQLite.db file.
Also, adding a timestamp and editing the Topic with the previous code we will create a database inside the file.
Take a look on the next pictures to have a better understanding of this procedure:
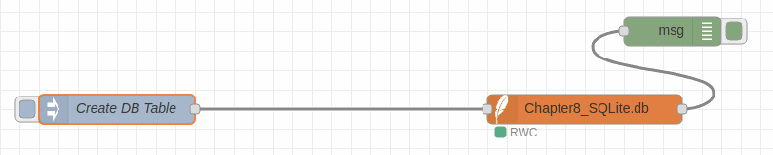
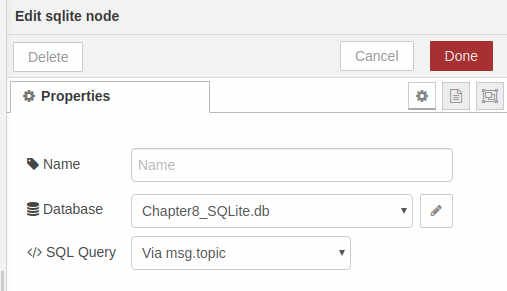
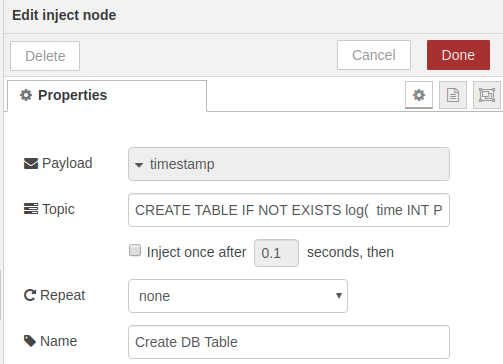
Now we can click on deploy and after that clicking on the Create DB Table, we will execute the SQLite code through the block and our database will be created properly.
Once we have created the database it's time to introduce our first characters and read them. Imagine that we have a data logger PLC that is sending to our NodeRED application the analog value of some sensor, and our project is to know their values over time. Then we have to create a database where the time and the values must be at the same row of our database.
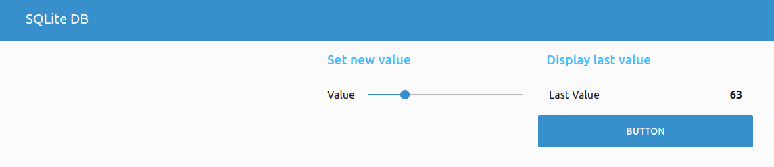
In order to do that we have created a user interface as an example with a slider, a button and a text. The slider will be to simulate the external analog value, text will be used to show the last value of our database and the button will be to update the last value that will be displayed in the text.
How to do that? It's quite simple.
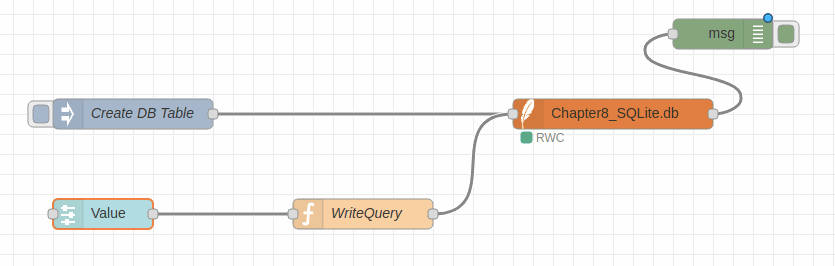
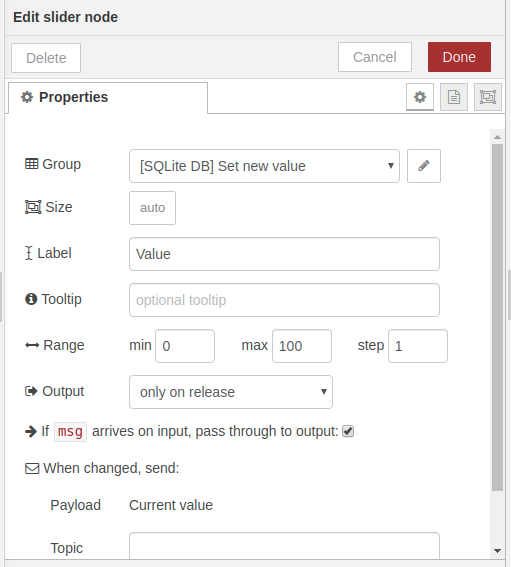
First of all, introduce the slider and configure them as you wish. It's important to check the case output "only on release", if not on every change we will save a value on our database. After configuring our slider we must introduce a function between the slider and the SQLite block.
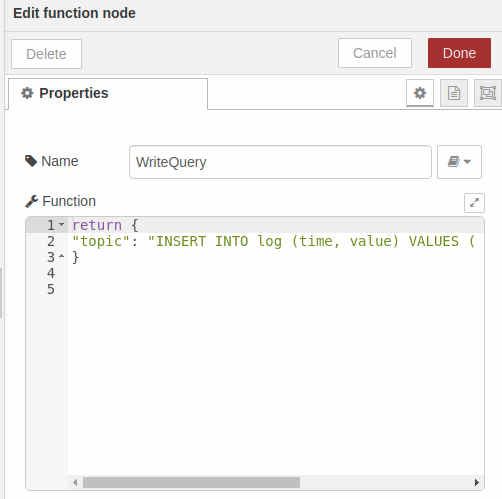
On this function we will place the next code following the SQLite bases:
return {
"topic": "INSERT INTO log (time, value) VALUES ( " + Date.now() +", "+ msg.payload +")"
}
This piece of code will be launched every time that we change the value on the slider to the SQLite block. With this we will insert a value and a timestamp to our table.
Next are showed some pictures of this process:
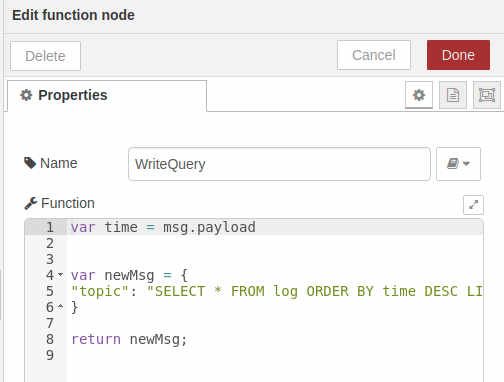
The last step will be displaying the last value of our database. We use the same method, just adding a different code on our function node:
var time = msg.payload
var newMsg = {
"topic": "SELECT * FROM log ORDER BY time DESC LIMIT 1"
}
return newMsg;
Next is showed the configuration of every block in case that there is any doubt:

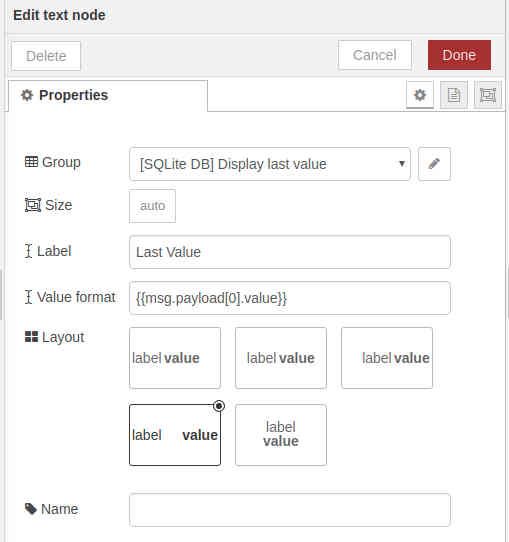
Finally add your customized parameters on the layout.
Hope that this chapter has helped you in having a new feature of NodeRED and that you now are able to implement databases in your project.
Next is showed our example layout:
Commenting is not enabled on this course.