Lesson 5. Modbus TCP: read and write a slave device
#5 Communications: How to read and write variables of a slave device through Modbus TCP/IP
Introduction
The content of chapter #5 is focused on controlling a slave device through Modbus TCP/IP. This device is connected to the same network through Ethernet. In this case, the device is an M-Duino 21+ using the slave code that is posted in our blog.
This is the first requirement to complete and try the new lesson, apart from having the Node-RED installed.
Modbus is a very useful standard that allows us to communicate several devices from different manufacturers in the same network. Besides Modbus, TCP/IP is transferred through Ethernet, which is one of the most reliable protocols of the market.
In this case, we will show how to configure Node-RED in order to control one of the slaves of our system.
Modbus masters normally have 8 main functions:
readCoils()
readDiscreteInputs();
readHoldingRegisters();
readInputRegisters();
writeSingleCoil();
writeSingleRegister();
writeMultipleCoils();
writeMultipleRegisters();
Installation
Type in your terminal or command prompt after placing your terminal in the root directory of your NodeRED, use the .node-red/:
cd .node-red/npm install node-red-contrib-modbustcpNow you will see two new Modbus nodes in your Node-RED application. Note (2026): node-red-contrib-modbustcp is no longer maintained. It still installs and works to follow this chapter, but for new projects we recommend node-red-contrib-modbus, which offers equivalent Modbus Read and Modbus Write nodes.
Developing the Application
Often in our installations, we have the same two main functionalities to control. Inputs and Outputs. As we have done in the previous chapters we have split the content.
Inputs
To read the inputs of the slave, use the modbustcp in node (Modbus TCP read). Select the same server (10.10.10.4), the function code (FC 1 Read Coils, FC 2 Read Discrete Inputs, FC 3 Read Holding Registers or FC 4 Read Input Registers), the start address, the number of values and the poll rate. The node returns an array with the values read: split it with a function node and show each value on the dashboard with gauge or text nodes, as in chapter #2.
Outputs
Modbus TCP client node. Connects to a Modbus TCP server to write msg.payload to a coil or register.
Function codes currently supported include:
- FC 5: Write Single Coil
- FC 6: Write Single Holding Register
- FC 15: Write Multiple Coils
- FC 16: Write Multiple Holding Registers
By choosing the datatype and the Address we will be able to access our slave outputs and control them.
After installing the NodeRED Library to use the Modbus TCP/IP communication protocol, we are able to use their nodes. But before using the main block that will arrange the communication we will have to configure some parameters. We will have to specify the Type and the Address. Type will be the Modbus function and the Address will be the position of the node red array where our desired I/Os are placed.
Select one switch and name it as you wish. There is no additional configuration for this node.
Then, select the change block placed on the function blocks. Type "address" on the function to give an address to the Javascript Object.
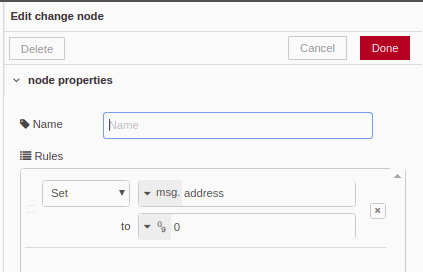
After that our switch will send a message (1/0) and additionally will have an address that is pointing to the right output.
Do the same for the dataType, add a change function type dataType and give the same for all the switches, FC5.
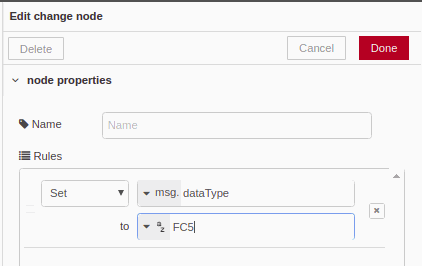
Finally, select the modbus tcp block into the output nodes. Give a name to the block. Into the configurations, Type and Address are toked for the node if you are not defined before for other nodes. In our case we will define before to have just one connection opened with our PLC.
So, select any Type and Address. Then configure your Modbus IP Server to the node, in our example we have used 10.10.10.4 IP.
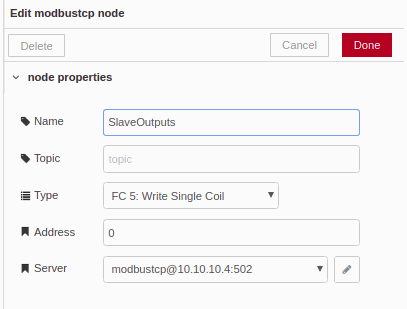
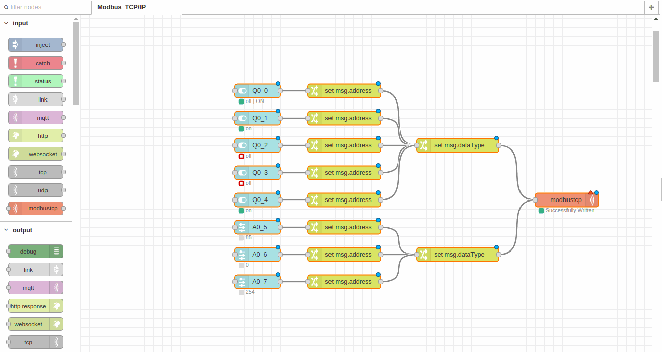
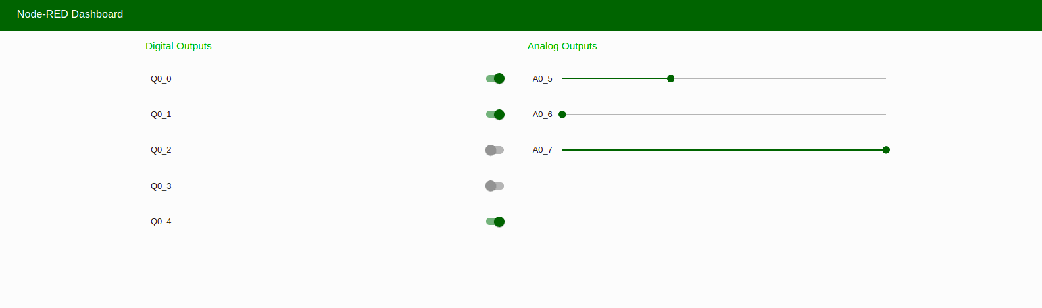
If we do the same process for analog outputs adding sliders instead of switches we get the entire control of the outputs. The second change node we must select dataType as FC6.
Below is shown the entire output flow and the user interface.
Commenting is not enabled on this course.