
To use LabVIEW with an Arduino based PLC you need four pieces of software, installed in this order: LabVIEW (32-bit), the NI-VISA driver, VI Package Manager (VIPM) and the LINX toolkit. LabVIEW Community Edition already includes LINX. Then you upload the LINX firmware to the PLC from LabVIEW, and the PLC works as I/O controlled by LabVIEW over USB.
This guide explains what each component does, where to download it, the order of installation and how to check that LabVIEW talks to an M-Duino PLC. The screenshots come from an older version (LabVIEW 2019 and 2020, Windows in Spanish). The menus of newer versions are similar.
- Step 1LabVIEW32-bit, Community or a paid edition
- Step 2NI-VISADriver for the serial port
- Step 3VIPMInstalls LabVIEW add-ons
- Step 4LINXToolkit and firmware for the PLC
What each component does
| Component | What it does | Where to get it |
|---|---|---|
| LabVIEW | Graphical programming environment from NI (National Instruments). The program runs on the PC. | ni.com, with an NI account. Installed with NI Package Manager |
| NI-VISA | Driver that gives LabVIEW access to serial (COM), USB, Ethernet and GPIB instruments. LINX uses it to open the serial port of the PLC. | ni.com, drivers section |
| VI Package Manager (VIPM) | Tool from JKI that downloads and installs LabVIEW add-ons. The Community edition is free for non-commercial use. | vipm.io |
| LINX toolkit | LabVIEW functions (VIs) to read and write the pins of Arduino, Raspberry Pi and BeagleBone boards, and the firmware for the board. | Included in LabVIEW Community Edition. For other editions, NI LabVIEW LINX Toolkit in VIPM |
Which LabVIEW edition? LabVIEW Community Edition is free for non-commercial use and includes LINX. For commercial projects you need a paid LabVIEW license, and you add LINX with VIPM.
Step 1: download and install LabVIEW
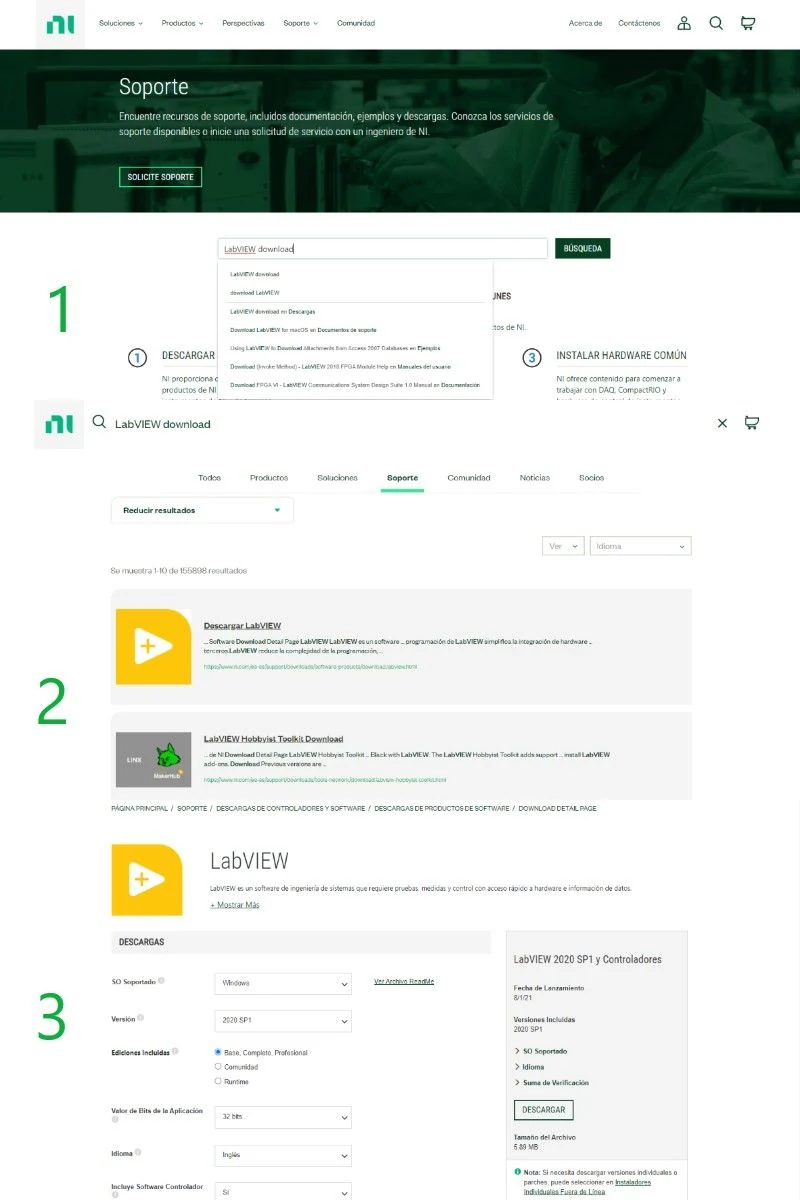
- Create an NI account and open the LabVIEW download page, or the LabVIEW Community download page.
- Select Windows, the version and the language, and choose the 32-bit application. The NI LabVIEW LINX Toolkit works only with 32-bit LabVIEW.
- Run the installer. It installs NI Package Manager first and then LabVIEW. Accept the licence and restart the PC when it asks.
Step 2: install the NI-VISA driver
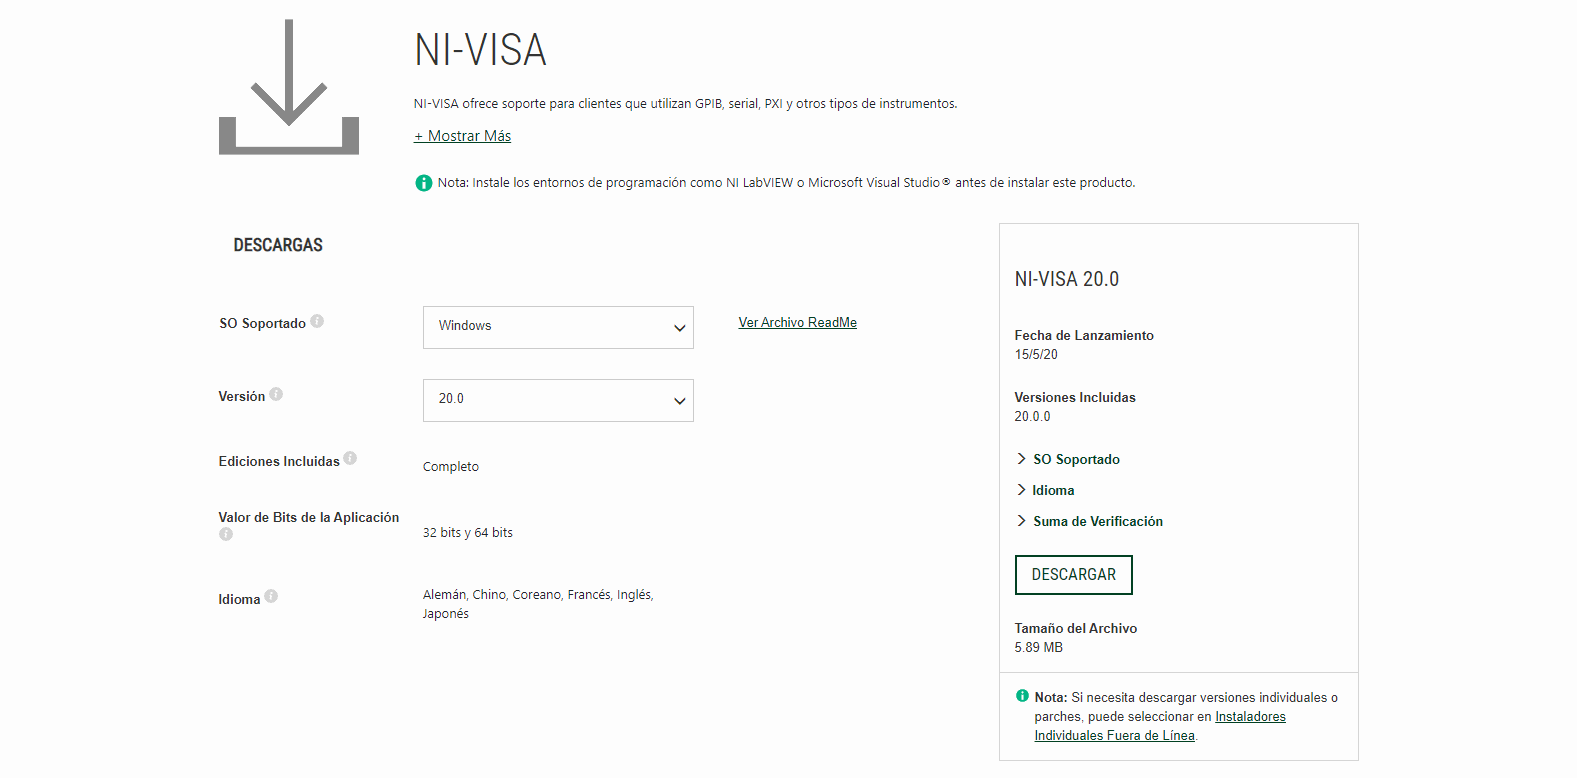
Install NI-VISA after LabVIEW: NI recommends installing the programming environment first. Open the NI-VISA download page, choose the version that matches your LabVIEW and run the installer. Without NI-VISA, LabVIEW cannot open the COM port of the PLC and LINX does not find the board.
Step 3: install VI Package Manager
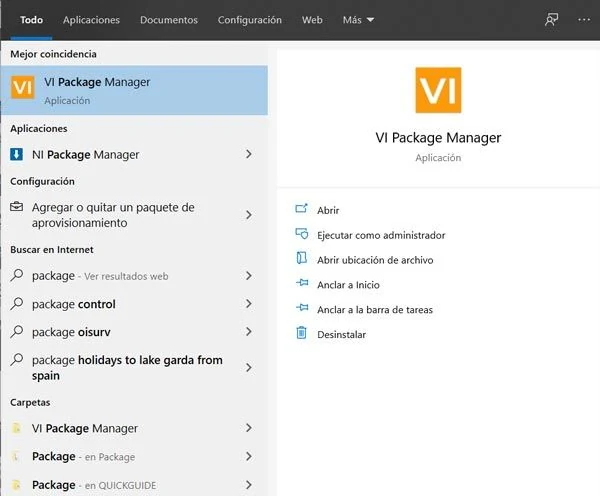
Download VIPM from vipm.io (Community edition for non-commercial use) and install it. Open it from the Windows start menu. The first time, VIPM takes a few minutes to load the list of packages. If it cannot install a package, close it and open it again with Run as administrator.
Step 4: install the LINX toolkit for Arduino
- LabVIEW Community Edition: LINX is already included. Do not install the toolkit again.
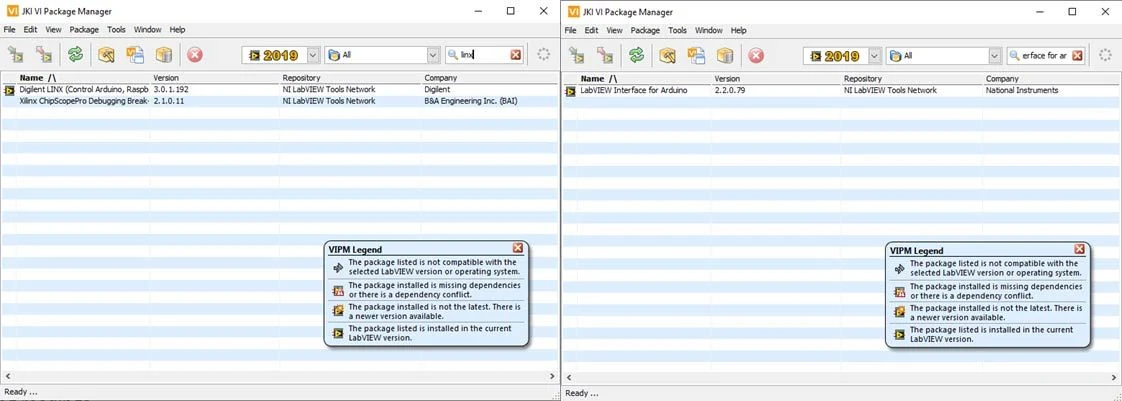
- LabVIEW 2020 or later, Base, Full or Professional (32-bit): in VIPM, search for NI LabVIEW LINX Toolkit, select it and click Install. Restart LabVIEW.
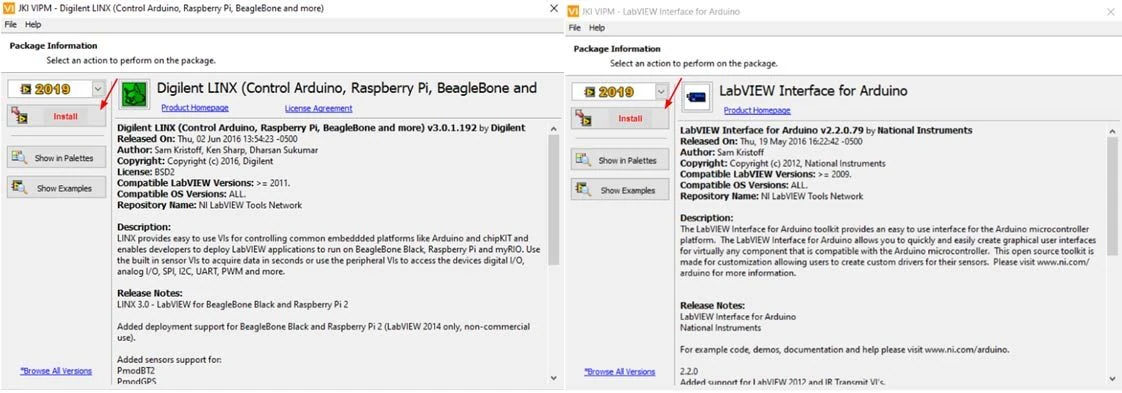
- LabVIEW 2014 to 2019: the older package Digilent LINX (version 3.0) is the one in these screenshots. It is deprecated, so use it only if you must keep an old LabVIEW version.
The older LabVIEW Interface for Arduino (LIFA) toolkit has been replaced by LINX. Install LINX for new projects.
Check the installation with an M-Duino PLC
The M-Duino PLCs are based on the Arduino Mega 2560, so LINX treats them as a Mega 2560 board.
- Power the PLC with 12 to 24 Vdc and connect it to the PC with the USB cable.
- In LabVIEW, open Tools > MakerHub > LINX > LINX Firmware Wizard. Select the Arduino family, the Mega 2560 board and the COM port of the PLC, and click Next until the firmware is uploaded.
- Open the example LINX - Blink (Simple) (Help > Find Examples, or the MakerHub > LINX folder of the LabVIEW examples), select the COM port and run it. The output you choose must switch on and off.
LINX uses the Arduino pin numbers, not the PLC labels. To find which Arduino pin is each input or output (for example Q0.0 or I0.0), check the pinout in the User Guide of your M-Duino model. Some outputs share pins with analog outputs and depend on the position of the switches. With the LINX firmware, the PLC runs only while LabVIEW is connected: the program stays on the PC. For a PLC that runs on its own, program it with the Arduino IDE.
The full example with LEDs, switches and the circuit is in Industrial Arduino based PLC programmed with LabVIEW.
FAQ about installing LabVIEW, NI-VISA and VIPM
Is LabVIEW free?
LabVIEW Community Edition is free for non-commercial use. Commercial use needs a paid license.
Can I use 64-bit LabVIEW with Arduino?
Not with the NI LabVIEW LINX Toolkit from VIPM: it requires 32-bit LabVIEW 2020 or later. Install the 32-bit version if you plan to use LINX.
Do I need NI-VISA to use an Arduino with LabVIEW?
Yes. LINX talks to the board over a serial port, and LabVIEW opens serial ports through NI-VISA.
What is the difference between LIFA and LINX?
LIFA (LabVIEW Interface for Arduino) was the first toolkit for Arduino and is no longer developed. LINX replaced it and also supports Raspberry Pi and BeagleBone.
Does the PLC keep running if I close LabVIEW?
No. With the LINX firmware the PLC executes the commands that LabVIEW sends. Program the PLC with the Arduino IDE when it must work without a PC.
LabVIEW with Industrial Shields PLCs
- LabVIEW Arduino projects for industrial applications
- Industrial Arduino based PLC programmed with LabVIEW
- Industrial Arduino based PLC programming with LabVIEW, part 2
- First steps using LabVIEW with an Arduino PLC
The M-Duino family goes from the M-Duino 19R (6 inputs and 11 outputs) to the M-Duino 58 (36 inputs and 22 outputs), with Ethernet and RS-485.
Take it further
LabVIEW is a common choice for test and measurement benches. These pages show the PLC side of a bench: a result per serial number and an instrument driven over a serial line.
Case study
Test every unit. Keep the result.
An M-Duino 42 runs the test steps and records OK or KO for each serial number, with the date from the RTC and the result stored on the SD.
Read the case study
Simulator
Run an end-of-line test sequence and see each step pass or fail
An M-Duino 42 runs the sequence on an example cable harness, drives an insulation tester and writes an OK or KO result for each step.
Open the simulator
PLC Solution Library
Driving a programmable power supply over SCPI from a PLC
A Raspberry PLC 19R drives a lab power supply over USB serial at 9600 baud with pyserial: setpoints, output switching and readback.
See the example