MQTT client on Raspberry PLCs
MQTT client on Raspberry PLCs
A Raspberry PLC can work as a broker and as a client at the same time. In this lesson it publishes and subscribes with Node-RED and with Python. Use the local Mosquitto broker of the PLC, configured as in the previous lesson (with user and password). Public brokers such as test.mosquitto.org or broker.emqx.io are handy to learn because they need no setup, but anyone can read what you publish there: use them only for demos with test data, never for real plant data.
Node-RED
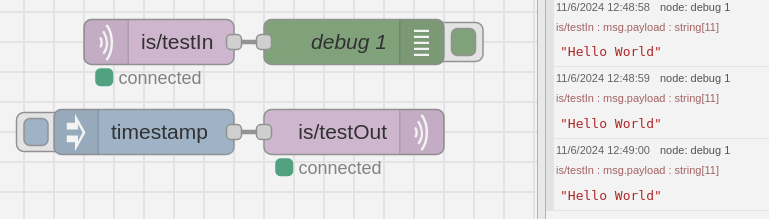
Open the Node-RED editor in the browser at the address shown by node-red-start, typically http://10.10.10.20:1880. Drag an MQTT in node and an MQTT out node and configure the broker in both:
- Server:
localhost(the broker of the PLC itself). - Port: 1883.
- Protocol: MQTT V3.1.1.
- Security tab: the user and password of the broker.
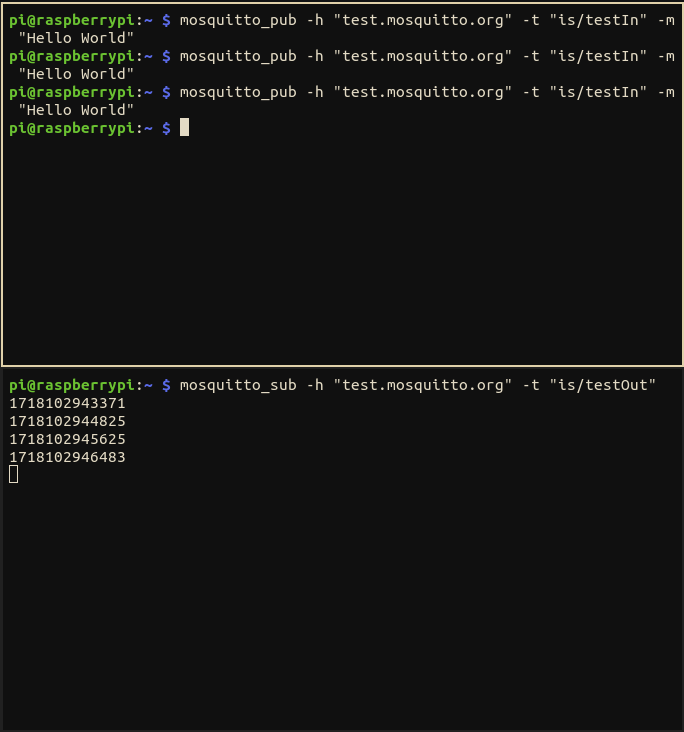
Use the topic is/testIn in the MQTT in node and is/testOut in the MQTT out node. Leave the rest by default, and connect an Inject node and a Debug node. After deploying the flow, click the inject button to publish the timestamp to is/testOut; the Debug node shows what arrives in is/testIn.
Python
The Paho package provides what you need to build a complete MQTT system in Python. Install it in a virtual environment (recent Raspberry Pi OS versions do not allow system-wide pip installs):
python3 -m venv ~/mqtt-env
. ~/mqtt-env/bin/activate
pip install paho-mqtt
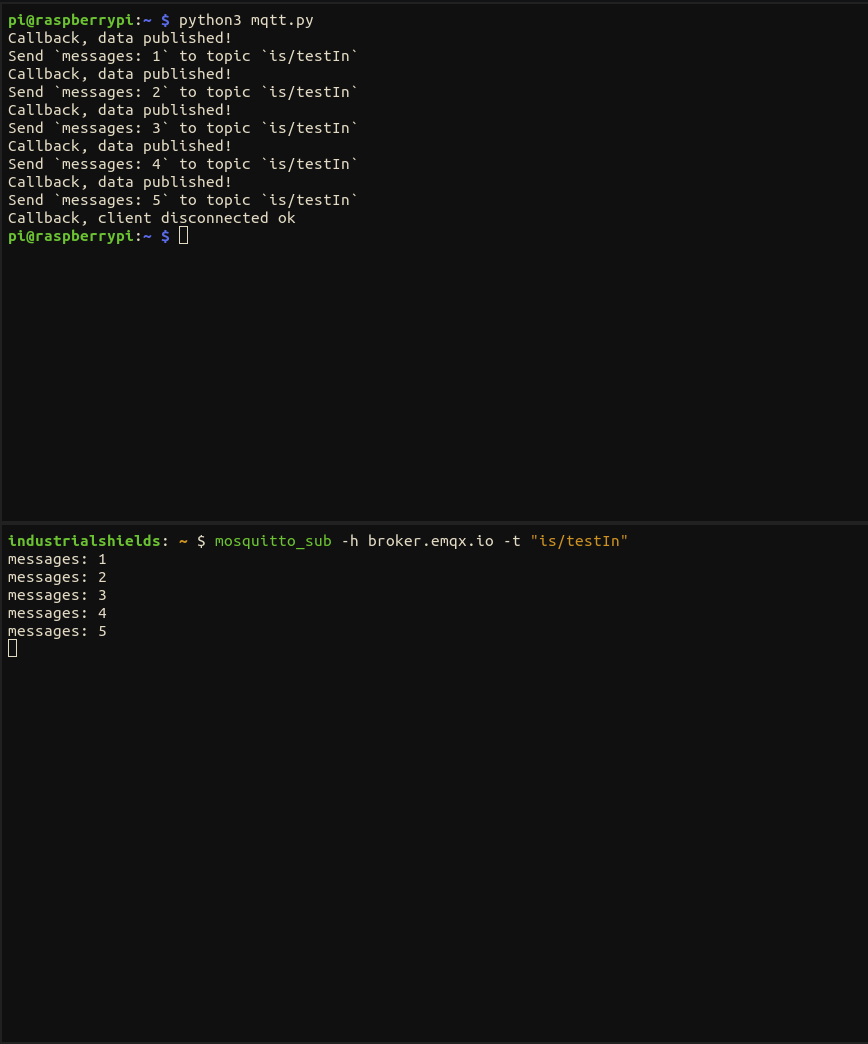
This example publishes a counter once per second, 5 times:
import time
import paho.mqtt.client as paho

broker = 'localhost'
port = 1883
topic = "is/testIn"

def on_publish(client, userdata, mid, reason_code, properties):
    print("Callback, data published!")

def on_disconnect(client, userdata, disconnect_flags, reason_code, properties):
    print("Callback, client disconnected ok")

def connect_mqtt():
    client = paho.Client(paho.CallbackAPIVersion.VERSION2)
    client.username_pw_set("plcuser", "your-password")
    client.on_publish = on_publish
    client.on_disconnect = on_disconnect
    client.connect(broker, port)
    client.loop_start()   # network loop in a background thread
    return client

def publish(client):
    for msg_count in range(1, 6):
        time.sleep(1)
        msg = f"messages: {msg_count}"
        result = client.publish(topic, msg)
        if result[0] == 0:
            print(f"Send `{msg}` to topic `{topic}`")
        else:
            print(f"Failed to send message to topic {topic}")

def run():
    client = connect_mqtt()
    publish(client)
    client.loop_stop()
    client.disconnect()

if __name__ == '__main__':
    run()
The script has these blocks:
- Broker definition: the broker, the port 1883 and the topic where the data is published,
is/testIn. - Callbacks: functions called when the client publishes data or disconnects. They are useful when you need to do something right after publishing.
- Connection:
connect_mqtt()creates the client, sets the credentials, registers the callbacks and starts the network loop. - Publication:
publish()sends a counter each second, 5 times. - Main code:
run()connects, publishes and disconnects.
Explore the Raspberry PLC range at www.industrialshields.com.
There are no comments for now.
to be the first to leave a comment.