Introduction
The basics of the SPIFFS file system have been covered in the previous post where we talked about the basic operations to read, write, delete and append files.
But what if you have multi line scripts that we need to upload to the SPIFFS, and writing that code in our Arduino sketch is very inefficient.
In this example, you will see how to run a small web server from the ESP32 PLC with the server files in the ESP32’s SPIFF system. You will use this server to access the GPIO pins of the PLC and control the inbuilt LEDs of the Industrial PLC. To upload files, you will use a filesystem uploader plugin. This can further be developed for other applications such as storing and displaying sensor data.
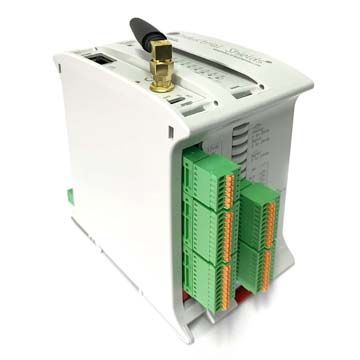
For this demo, we are using the 10 I/O ESP32 Industrial PLC.


Filesystem Uploader plugin installation
In order to upload files to the ESP’s SPIFFS file system, you will be using a plugin called ESP32 Filesystem Uploader plugin. This plugin will help you to upload the files straight to the SPIFFS system. You can install it by following the below steps:
Installation
1. Update Arduino IDE
2. Update Industrial Shields boards libraries
3. Go to this link and download the ESP32F-1.0.zip file
4. Unzip the file in the tools folder of Arduino IDE’s directory as shown.

5. Restart Arduino IDE, and check if the plugin option appears.

How to upload the files
Create an Arduino sketch and save it.
Go to the folder of the sketch (CTRL + K)
Inside this folder, create another folder and name it “data”
The data folder will contain the files that we want to upload to the board
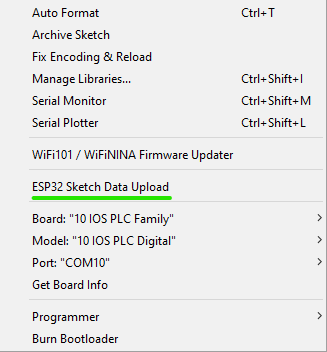
From the tools drop down menu, select ESP32 sketch data upload to upload files
And that is it, the files should be uploaded. You can check if they are uploaded using the code in the Basics of SPIFFS file system.
Running a web server on an Industrial ESP32 PLC
Since this is going to be a small server for demonstration, there are only two files that needs to be uploaded to the SPIFFS system. Also, you will need the ESPAsyncWebServer and Async TCP library. You can read more about the library here . You can download the .zip file from the same link as well.
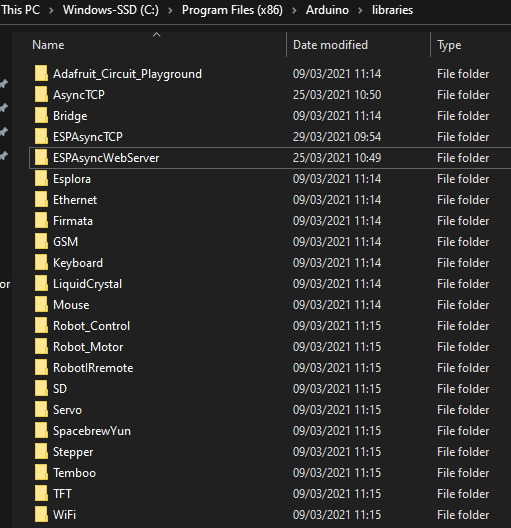
Unzip and rename the folder from ESPAsyncWebServer-master to ESPAsyncWebServer and put it in Arduino IDE’s installation libraries folder as shown.

The ESPAsyncWebServer library requires the AsyncTCP library to work.
You can download the library from this link.
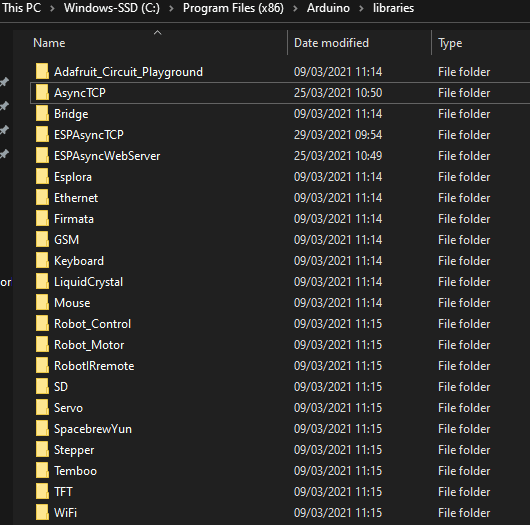
Unzip, rename (to AsyncTCP) and move the folder to Arduino IDE’s installation libraries folder.

Restart Arduino IDE.
Code
esp32plc_webserver_spiffs.ino
Import required libraries
#include "WiFi.h"
#include "ESPAsyncWebServer.h"
#include "SPIFFS.h"
Replace with your network credentials
const char* ssid = "Amilrt";
const char* password = "12345678";
Set LED GPIO
const int ledPin = Q0_9;
Stores LED state
String ledState;
Create AsyncWebServer object on port 80
AsyncWebServer server(80);
Replaces placeholder with LED state value
String processor(const String& var){

  Serial.println(var);
  if(var == "STATE"){
    if(Serial.println("HIGH")){
      ledState = "ON";
    }
    else if (Serial.println("LOW")){
      ledState = "OFF";
    }
    Serial.print(ledState);
    return ledState;
  }
  return String();
}
void setup(){
Serial port for debugging purposes
  Serial.begin(115200);
pinMode(ledPin, OUTPUT);
Initialize SPIFFS
  if(!SPIFFS.begin(true)){
    Serial.println("An Error has occurred while mounting SPIFFS");
    return;
  }
Connect to Wi-Fi
 WiFi.begin(ssid, password);
  while (WiFi.status() != WL_CONNECTED) {
    delay(1000);
    Serial.println("Connecting to WiFi..");
  }
Print ESP32 Local IP Address
Serial.println(WiFi.localIP());
Route for root / web page
server.on("/", HTTP_GET, [](AsyncWebServerRequest *request){
    request->send(SPIFFS, "/index.html", String(), false, processor);
  });
Route to load style.css file
  server.on("/style.css", HTTP_GET, [](AsyncWebServerRequest *request){
    request->send(SPIFFS, "/style.css", "text/css");
  });
Route to set GPIO to HIGH
  server.on("/on", HTTP_GET, [](AsyncWebServerRequest *request){
      digitalWrite(ledPin, HIGH);
    request->send(SPIFFS, "/index.html", String(), false, processor);
  });
Route to set GPIO to LOW
  server.on("/off", HTTP_GET, [](AsyncWebServerRequest *request){
    digitalWrite(ledPin, LOW);
    request->send(SPIFFS, "/index.html", String(), false, processor);
  });
Start server
  server.begin();
}
  void loop(){
index.html
<!DOCTYPE html>
<html>
<head>
  <title>ESP32 PLC Web Server</title>
  <meta name="viewport" content="width=device-width, initial-scale=1">
  <link rel="icon" href="data:,">
  <link rel="stylesheet" type="text/css" href="style.css">
</head>
<body>
<img src="ispic.jpg" alt="ispic">
  <h1>SPIFFS Web Server Industrial PLC</h1>
  <h2>PLC used : 10 I/O ESP32 </h2>
  <p>GPIO state: <strong> %STATE%</strong></p>
  <p><a href="/on"><button class="button">ON</button></a></p>
  <p><a href="/off"><button class="button button2">OFF</button></a></p>
</body>
</html>
style.css
html {
  font-family: Arial;
  display: inline-block;
  margin: 0px auto;
  text-align: center;
}
img {
  border: 1px solid #ddd;
  border-radius: 4px;
  padding: 5px;
  width: 150px;
}
h1{
  color: #006400;
  padding: 2vh;
}
h2{
  color: #006400;
  padding: 2vh;
}
p{
  font-size: 1.5rem;
}
.button {

  background-color: #006400;
  border: none;
  border-radius: 6px;
  color: white;
  padding: 16px 40px;
text-decoration: none;
  font-size: 30px;
  margin: 2px;
  cursor: pointer;
}
.button2 {
  background-color: #A9A9A9;
}

How to: Industrial ESP32 PLC web server using SPIFFS