Introduction
Do you want to learn how to program the CAN SPI Click board to communicate your new Raspberry Pi based PLC v4 with other devices through CANBUS?
In this post, we will learn how to download the tools compatible with Raspberry Pi to be able to work with CANBUS quickly and easily.
IMPORTANT: It must be taken into account that with this software modification RS-485 cannot be used in the same PLC. If you undo it you can use RS-485 again; CAN and RS-485 cannot be used simultaneously. Apart from that, you must consider that the models with CAN loose the I2.6 in the PLCs which has the 3rd floor analog and 2.4 in the PLCs which has the 3rd floor relay.
Requirements
- x2 industrial Raspberry PLC v4
- x2 CAN SPI Click
- Power Supply
- Either HDMI > or SSH connection > to the Raspberry PLCs
Connections
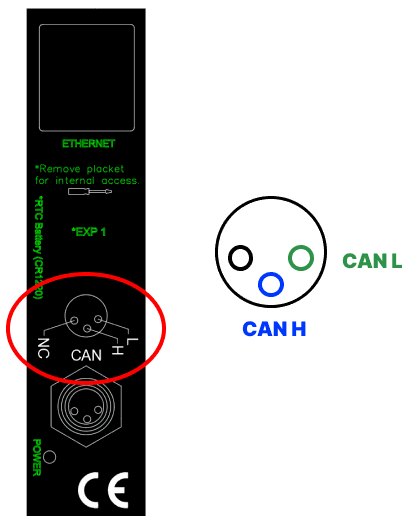
From the CANBUS connector from a Raspberry Pi industrial PLC, get a twisted pair cable and connect it to your device. Make sure that the CAN L is connected to the CAN L, and CANH to CANH.

Configuration
The new version of Raspberry Pi PLC controller comes with a CAN SPI Click, which through SPI, adds CANBUS to your industrial device.
So to make sure that everything works correctly and is ready to be used, we are going to do some checks by following these steps:
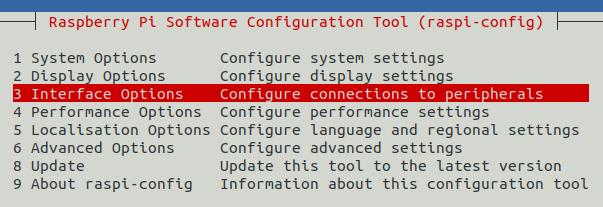
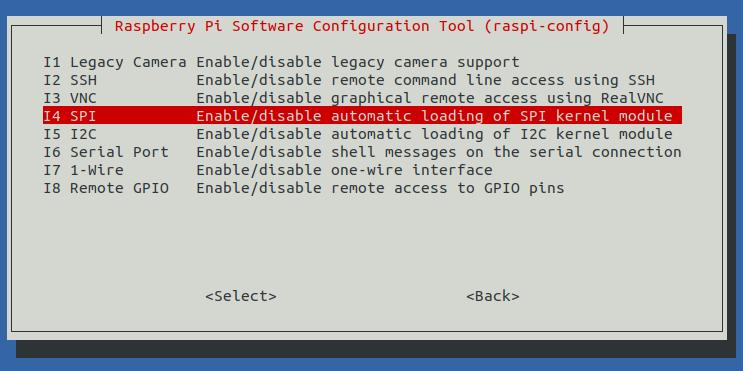
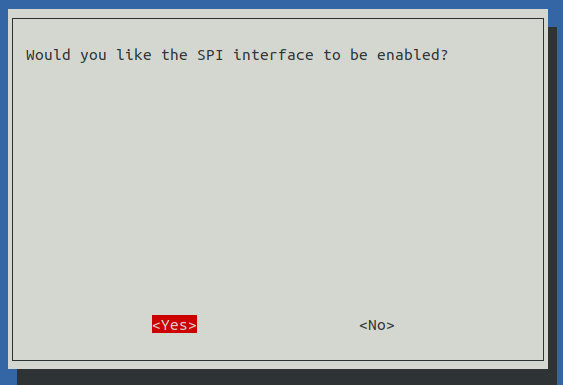
Check that SPI is enabled. From the terminal window, open the Raspberry Pi software configuration tool:
sudo raspi-config
Select 3. Interface Options

Select I4 SPI

Select Yes to the question: Would you like the SPI interface to be enabled?

Open the configuration file that is executed when you boot your industrial Raspberry Pi PLC:
sudo nano /boot/config
Find the following lines in the file from step 5. If they are not, include them AT THE END OF THE FILE and reboot your open source PLC Raspberry Pi.
dtoverlay=spi1-3cs
dtoverlay=mcp2515,spi1-2,oscillator=10000000,interrupt=4,speed=125000
Check that the MCP has been successfully initialized by running:
dmesg | grep mcp

Check that there is a file called can0 in the directory: /etc/network/interfaces.d/ with the following content:
auto can0
iface can0 inet manual
    pre-up /sbin/ip link set can0 type can bitrate 500000 triple-sampling on restart-ms 100
    up /sbin/ifconfig can0 up
    down /sbin/ifconfig can0 down
Check that your interface is ready to be used:

CAN-UTILS
1. Once ready, install the can-utils tool.
sudo apt install can-utils
2. From a Raspberry PLC v4, execute the following command to wait for the incoming data.
candump can0
3. From the other Raspberry PLC v4, send information like:
cansend can0 111#FF
4. From where you had the candump can0, make sure that you got the results:

Do you have the Raspberry PLC version 3 and do you also want to test the CANBUS module?
How to communicate a Raspberry PLC v4 with CANBUS