Index
In order to make an object detection model with our Raspberry Pi PLC, we are going to follow this tutorial > and we are going to see the following:
1. What is machine learning?
2. What is TensorFlow?
3. Installation and setup
4. Creating a virtual environment
5. Collecting images using the webcam
6. Labelling images for object detection
7. Tensorflow Model Zoo
8. Training and evaluating the model
9. Detecting from an image
10. Detecting in real time
11. Tensorflow object Detection with Raspberry PLC
Introduction
Artificial intelligence is a branch of computational intelligence that aims to reproduce the cognitive abilities of human beings, such as the ability to learn, solve problems or make decisions.
In this post, we are going to see how you can also work with artificial intelligence and train your own custom object detection models using TensorFlow's object detection API and industrial automation.
In this way, you will be able to create an application that, through a webcam, you can analyze the objects that the camera detects. Then, activate or deactivate as many outputs as you want from your Raspberry Pi based PLC!
Requirements
- Raspberry Pi industrial PLC >
- USB camera >
- Power Supply >
- Either HDMI > or SSH > connection to the industrial Raspberry Pi PLC controller.
1. What is Machine Learning?
Machine learning is a learning technique that allows computers to learn through experience, similar to how humans do.
The technique is based on the use of algorithms that analyze a large amount of data, and from them, identify behavior patterns.
Once these patterns have been identified, the computer can use them to predict the behavior of an object or person in future situations.
The technique is increasingly used in various sectors, such as commerce, health or security, since it allows better decisions to be made based on the information available.
2. What is TensorFlow?
TensorFlow is an open source machine learning library used in the artificial intelligence industry.
It works by creating artificial neural networks, allowing it to learn from a wide variety of data.
TensorFlow can also be used to build machine learning models, allowing you to analyze and predict the behavior of large data sets.
3. Installation and setup
In order to setup the installation, let's install some packages in our PC first, in order to create a TensorFlow model and send it to the open source PLC Raspberry Pi at the end of this tutorial:
1. Make sure you have installed git and pip. If not, install them:
sudo apt update
sudo apt-get install git-all
sudo apt install python3-pip
2. Clone the repository from Nicholas Renotte's Github
git clone https://github.com/nicknochnack/TFODCourse.git
3. Install Jupyter Notebook.
pip install notebook
4. Creating a virtual environment
1. Create a new virtual environment inside the TFODCourse directory called TensorFlow Object Detection (tfod), or add the name that you wish:
cd TFODCourse
python -m venv tfod
2. Activate it.
- For Mac & Linux:
source tfod/bin/activate
- For Windows:
.\tfod\Scripts\activate
3. Update & install dependencies.
python -m pip install --upgrade pip
4. Add it to Jupyter Kernel.
pip install ipykernel
python -m ipykernel install --user --name=tfod
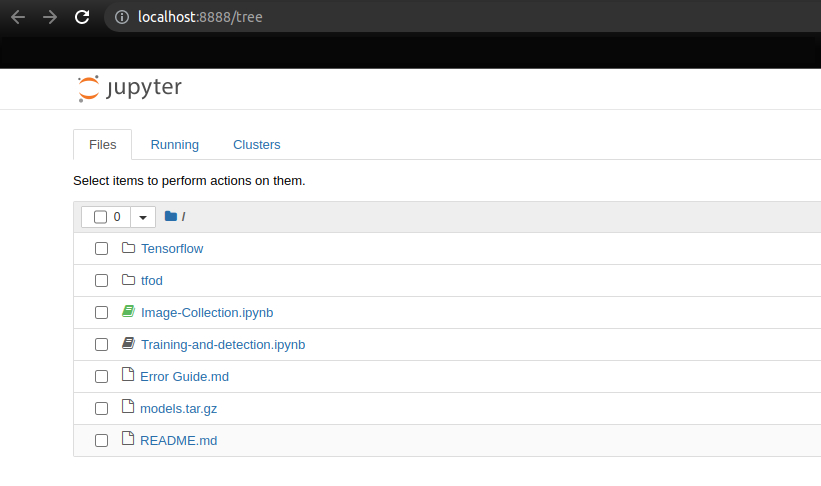
5. Open Jupyter Notebook.
jupyter notebook
5. Collecting images using the webcam
1. We are going to open the 1. Image Collection.ipynb first.
2. Go to the menu > Kernel > Change kernel > Select tfod.
3. Start running Jupyter notebook: from cell number 1, to section number 5. Image Labelling, included.
In case of errors, there is an Error guide.md which can be helpful. Also, be careful with the installed version, it can be the main reason for some of the errors. If some steps in the notebook do not work, you can try either running the commands in the terminal window.
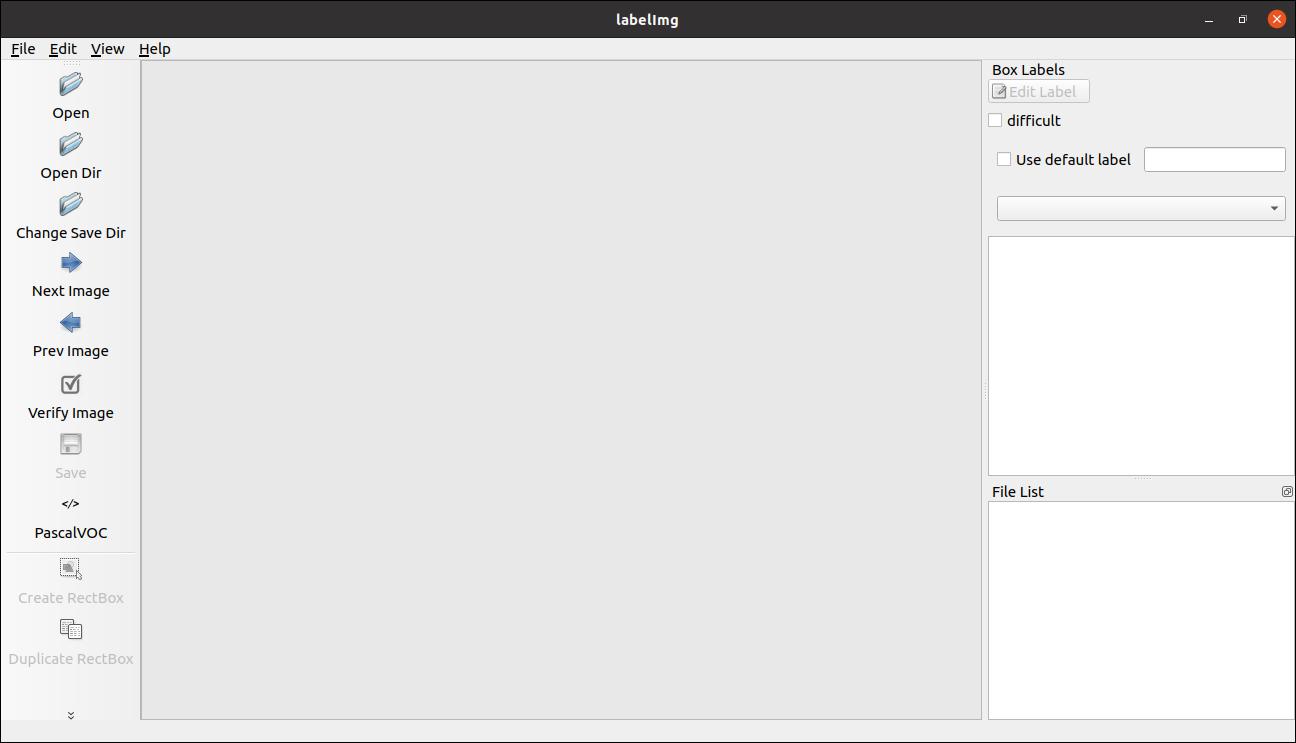
4. When running the last cell, it will open a new window. If it doesn't, try going to the directory where this program is, and run the following command:
cd ~/TFODCourse/Tensorflow/labelimg/
python labelImg.py
6. Labelling images for object detection
In machine learning, there are different ways of training a model for recognizing an object in a picture or in real-time using the webcam. In this tutorial, we are going to label as many pictures as we want. The more photos we take, the easier it will be for the model to recognize what objects it sees through the webcam.
1. So, once you are in the labellmg software, click on Open > Go to the Tensorflow/workspace/images/collectedimages directory and select the image that you want to label.
2. Click on the letter 'W' on your keyboard, and select the area from the picture that you would like to evaluate, set a label and save it.
3. Do the same with all the pictures.
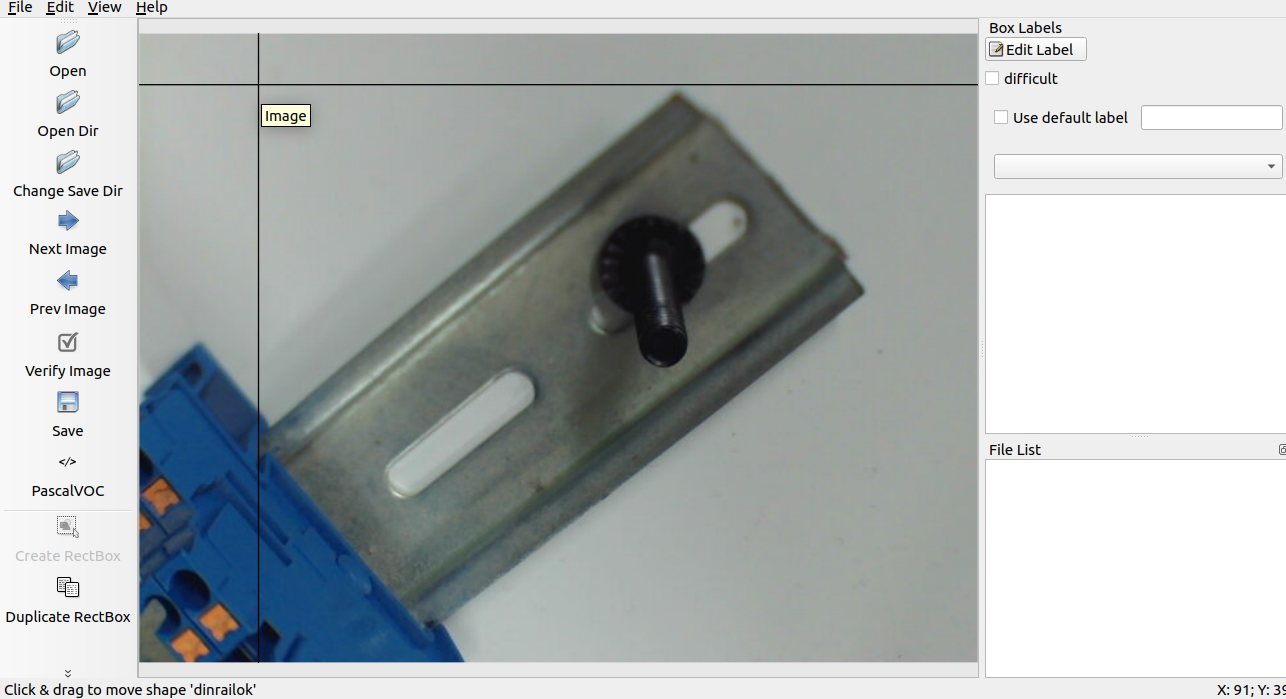
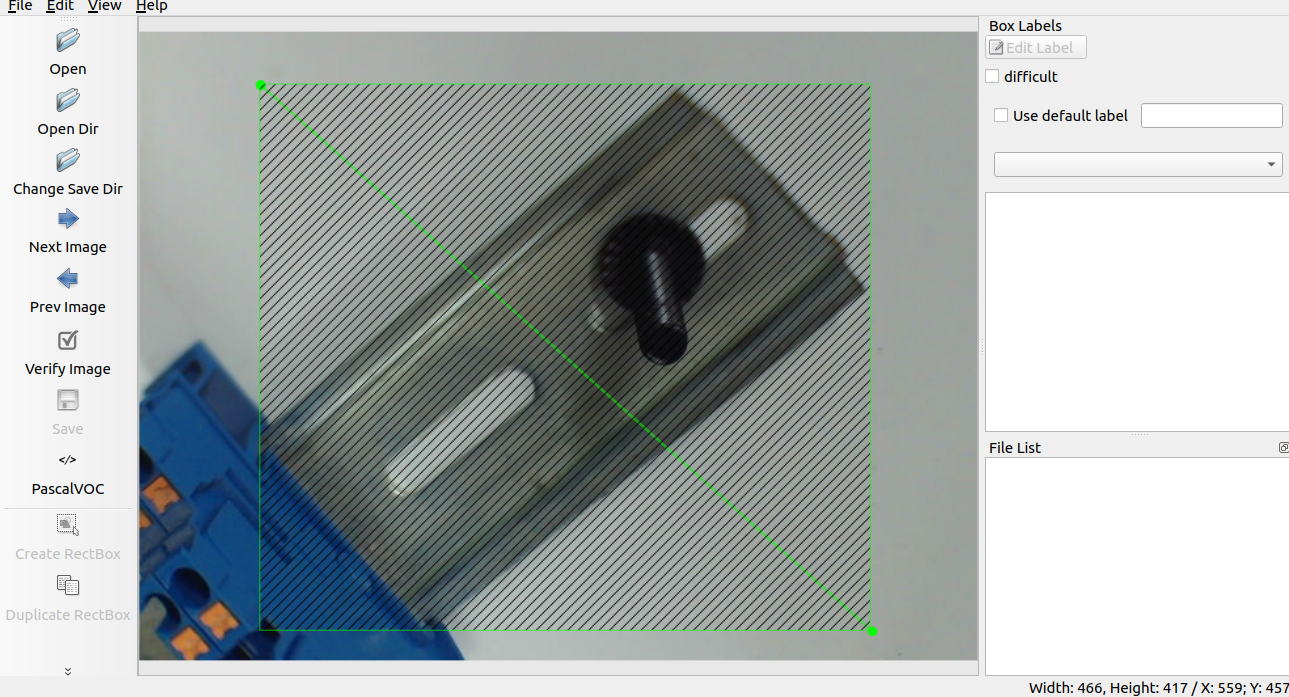
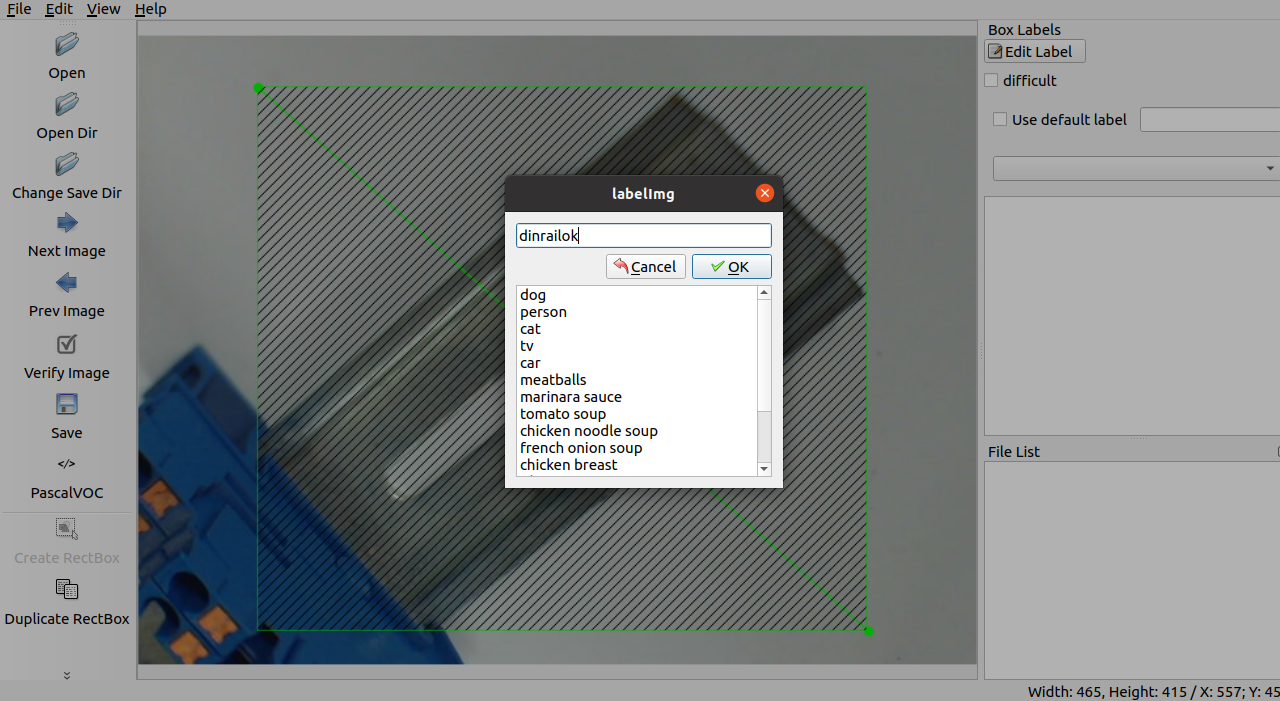
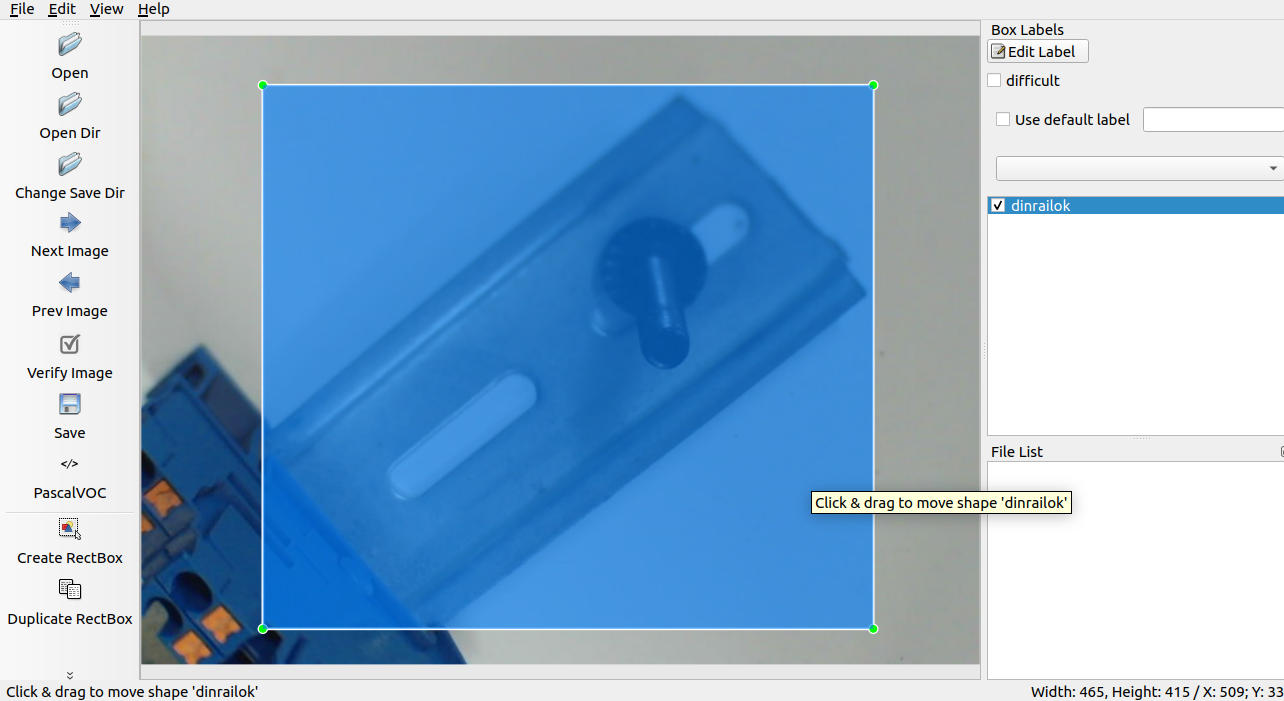
When you save, you will see that all an XML will be also saved next to the images they belong to.
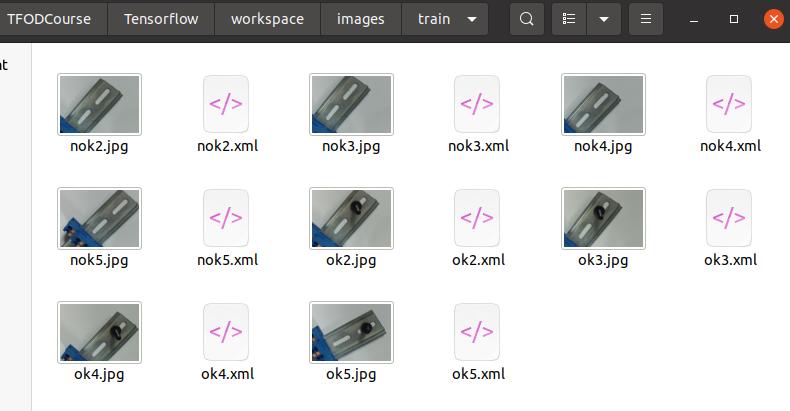
5. Now, move on these images of each label to the test folder with its own XML file.
6. Finish the Image Collection file from Jupyter Notebook and do step number 6.
7. TensorFlow Model Zoo
Once the first notebook is done, open the second one, called: 2. Training and detection.
1. Import os from the first cell of the notebook.
2. In the second cell, you can see that some variables have the name 'model'. If you visit the Github page from Tensorflow Model Zoo >, this is what you will see.

8. Training and evaluating the mode
3. Then, follow the steps until step 6, until printing the command.
4. Copy it, and paste it into your terminal window. Make sure that you are in the virtual environment of your PC. You can change the number of training steps to take as you want. In our case, 2000 steps are good for correct training.
This step can take some time.
5. We are going to do the same with the next step: 7. Evaluate the Model
9. Detect from an image
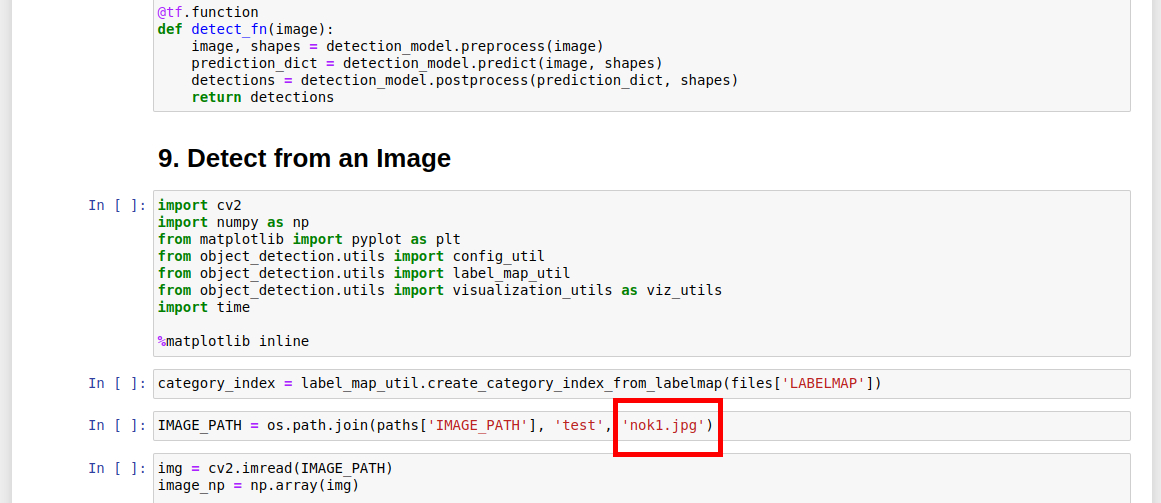
1. Keep going until step 9: Detect from an image, wherein the third cell, try to add an image to the Tensorflow/workspace/images/test folder, and set the name here:
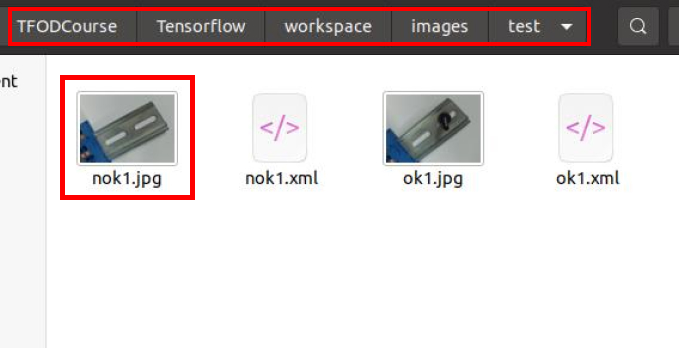
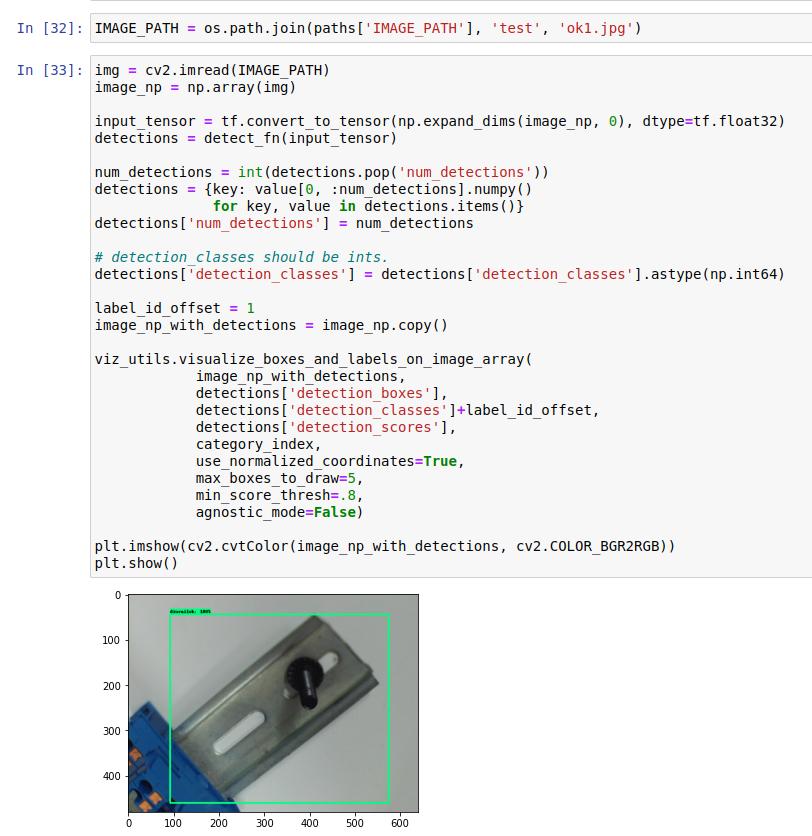
Keep running the cells and see how the image is detected with a label on it.
10. Detections from your webcam
Now, let's do some real time detections from our USB webcam.
1. Do not install opencv-python-headless unless you need it.
2. Then, run the next cell for detecting objects in real time
Complete the Jupyter Notebook by running the rest of the cells until step 12 when you get to generate the detect.tflite file.
Finally... TensorFlow object detection with Raspberry Pi PLC!
So far, we have been working with our laptop in order to generate the detect.tflite file. From now on, we will power on our Raspberry Programmable Logic Controller, we will connect the USB camera and we will be testing our application in the Raspberry Pi automation PLC. Please note that the object detection speed of the Raspberry PLC will be decreased compared to that of your computer.
1. So, clone this repository onto your industrial Raspberry PLC.
git clone https://github.com/nicknochnack/TFODRPi
2. Install the required dependencies.
pip3 install opencv-contrib-python==4.1.0.25  #This step will take some time
sudo apt-get install libcblas-dev
sudo apt-get install libhdf5-dev
sudo apt-get install libhdf5-serial-dev
sudo apt-get install libatlas-base-dev
sudo apt-get install libjasper-dev
sudo apt-get install libqtgui4
sudo apt-get install libqt4-testv
echo "deb https://packages.cloud.google.com/apt coral-edgetpu-stable main" | sudo tee /etc/apt/sources.list.d/coral-edgetpu.list
curl https://packages.cloud.google.com/apt/doc/apt-key.gpg | sudo apt-key add -
sudo apt-get update
sudo apt-get install python3-tflite-runtime
3. Copy the model called detect.tflite into the same repository. This is the filed that we just generated in the step number 10, which is located here: Tensorflow/workspace/models/raspberry_model/tfliteexport/saved_model/detect.tflite.
Also, update the labels.txt file to represent your labels.
4. Edit your detect.py file from the Raspberry PLC and change these lines:
boxes = get_output_tensor(interpreter, 0)classes = get_output_tensor(interpreter, 1)scores = get_output_tensor(interpreter, 2)count = int(get_output_tensor(interpreter, 3))
for these lines:
boxes = get_output_tensor(interpreter, 1)classes = get_output_tensor(interpreter, 3)scores = get_output_tensor(interpreter, 0)count = int(get_output_tensor(interpreter, 2))
Otherwise, you can get a "Typeerror: Only size-1 arrays can be converted to Python scalars"
5. Finally, run real time detections using the detect.py Python script!
python3 detect.py
For more details, please watch the following video tutorial >
Tutorial: TensorFlow Object Detection with Raspberry Pi PLC | Machine Learning