Introducing AI-powered object detection with Raspberry PLC
Object detection is the ability to identify and locate specific objects in an image or video. AI can do this job better due to its ability to learn patterns and characteristics of objects, allowing it to make accurate and efficient detections in large data sets in a rapid and automated manner.

A PLC with access to this technology is a very useful tool to execute tasks of:
- QA
- Security
- Process automation
- Logistics and materials handling (for example: tracking and sorting products in warehouses and distribution centers)
- Production optimization
- Predictive maintenance
Below, we show you how to implement this technology with a simple example, with the help of our Raspberry PLC and a model called MobileNet and SSD (Single Shot MultiBox Detector).
Requirements
- Raspberry PLC
- USB camera
- AI Model: MobileNetSSD. We will have to download the files:
MobileNetSSD_deploy.caffemodel:
MobileNetSSD_deploy.prototxt.txt:
How does it work ?
The concept is simple: the USB-connected camera to the Raspberry Pi captures video frames, which our script reads and feeds into the MobileNetSSD model to identify patterns in the image corresponding to objects it has been trained to detect. Once the object is detected, it returns its position, the name of the object, and the confidence level or probability of it being the identified object. Leveraging this, we'll generate a box in the frame displaying all this information. This process will be repeated for each video frame.
The MobileNetSSD model is already pre-trained to detect a series of objects:
0: 'background', 1: 'aeroplane', 2: 'bicycle', 3: 'bird', 4: 'boat', 5: 'bottle',
6: 'bus', 7: 'car', 8: 'cat', 9: 'chair', 10: 'cow', 11: 'diningtable', 12: 'dog',
13: 'horse', 14: 'motorbike', 15: 'person', 16: 'pottedplant', 17: 'sheep',
18: 'sofa', 19: 'train', 20: 'monitor'
These are the objects that we can detect.
Next, we are going to connect the USB camera to one of the USB inputs of the Raspberry PLC, by default it will be found in /dev/video0, make sure it is connected with the command:
lsusb
or, with:
ls /dev/video*
Now that we are sure that we have connected the camera to the Raspberry PLC, let's move on to the programming.
Programming time
We will use Python to generate the script and the OpenCV library.
First we will create a folder and put the files corresponding to the MobileNetSSD model in it, then we will create the Python file.
But first, we will create a virtual environment with the virtualenv tool to be able to install the necessary libraries, have good isolation of dependencies and avoid conflicts between projects.
Inside the folder that we have created, we execute the commands:
- Install virtualevn
sudo apt install virtualenv -y
- Create the environment:
virtualenv <virtual environment name>
- Activate the environment:
source <virtual environment name>/bin/activate
- Disable the environment:
deactivate
In our case, We will use the name venv:
virtualenv venv
source venv/bin/activate
When activated, it appears in the command line prompt with the name of the environment:
Not activated: pi@raspberrypi:~
Activated: (venv) pi@raspberrypi:~
Now we can install the necessary dependencies with pip: such as opencv-python, numpy, among others.
In order to see this object detection on the Raspberry PLC we are going to use the Flask library to generate a route within our local network, which provides us with a website where we can see the content captured by the camera.
In this case, the folder must have:
- The two AI model files
- The app.py (where the specified path will be provided)
- A directory called "templates" and inside an html file (example: /templates/index.html)
- The directory that will be generated when the virtual environment is created.
app.py:
index.html:
With these codes, the AI files, and the installed dependencies we will be able to see in the browser, in the path:
<raspberry ip>:5000/
Here is an example to execute it:
Now, from the browser of another computer connected to the same network as the raspberry plc, and searching in my case is: http://10.42.0.10:5000
we can see the result.
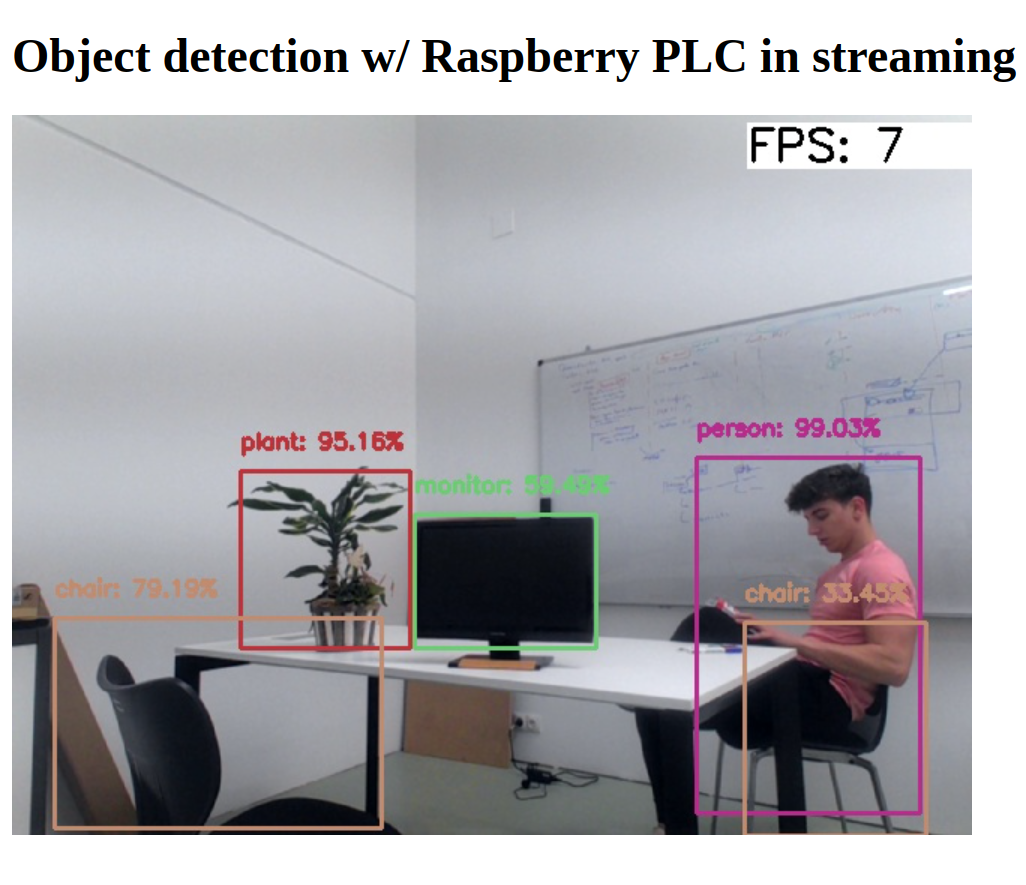
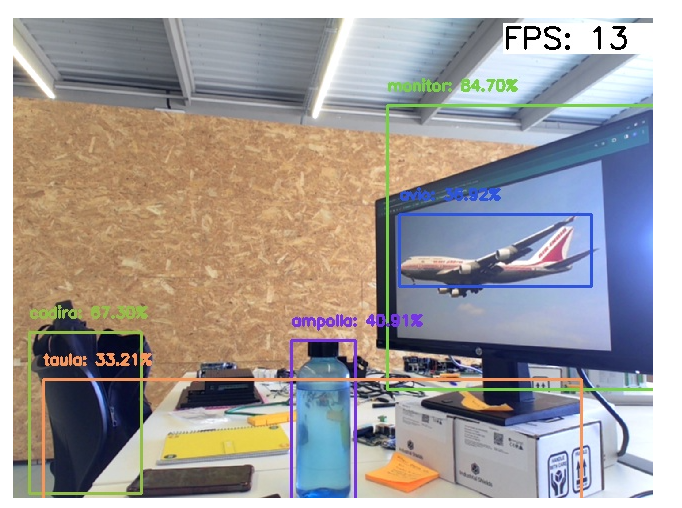
Here we will look at some casual examples that we have captured:


Comparison with PLC based on Raspberry Pi 4 vs Raspberry Pi 5
We have done several tests to compare performance with the different versions of the Raspberry. And testing with the PLC based on Raspberry Pi 4 we have achieved an average of 7 FPS with web streaming, and with the Raspberry Pi 5 an average of 15 FPS, double that of the Raspberry Pi 4.
FPS can be improved by using image quality rescaling and compressions at the time of data sending to achieve smoother streaming.
There are many types of pre-trained models for any kind of target, already created models can be trained or re-trained, in order to improve the efficiency and accuracy of detections.
Object detection w/ Raspberry PLC & AI