First steps using Arduino based PLC's
Start following this quick guides
You will know how to install the boards and understand why this is so important, also the switch options, and some basic and important information to start using the Industral PLC's based on Arduino
Programming
First steps on how install the boards and start to program the Industrial Arduino based PLC
Configuration / Setup
Understand the switching options, the led signal, etc,
Installation
Check the important points for the right installation and the correct power supply needs of the PLC
Take a look at our basic "How to's" in order to start using the PLC without the most common issues.
Installing the Industrial Shields boards in the Arduino IDE
Requirements
Arduino and ESP32 based PLC's
|
|
|
Description
The usage of the Industrial Shields boards is very important as they provide a lot of useful tools that simplify PLC programming. The most important things are 2:
- Automatic definition/variable association/pinmode of a pin.
- Automatic Industrial Shields libraries (PLC features).
The basic idea of the Industrial Shields boards is that it is a "collection of libraries" that are included in the Arduino IDE software, only if they are selected (when it is not selected an Arduino board).
The automatic definition/variable association/pinmode of a pin helps in the pinout configuration. Our pins (QX.X/IX.X/AX.X/RX.X) are referenced to a real Arduino pin. Depending on the model and the equipment these pins can be different. If the sketch is not made using the boards it won't be able expandable for future versions and for other models/equipments.
The only condition of using the Industrial Shields pins is (once you have already selected the Industrial Shields boards, Family and model) using a closed nomenclature. It must be changed the "." for a "_". So if you want to use the Q0.1 you only need to place it in the sketch as Q0_1.
In order to be able to program our equipment even more easily, it is possible to install it to Arduino IDE. Once installed will not be necessary to know which Arduino board that includes each equipment, neither to consult the mapping between the pins of Arduino board and INs and OUTs of the PLCs, not even will be necessary to use our libraries: now all this information will be included in the Arduino IDE. When you select one of our PLCs, INs and OUTs will be already available with their names, moreover as libraries that will facilitate the use of different communication ports (RS-232, RS-485, …).
The steps to follow to install our equipment’s to Arduino IDE are:
1- Open the Arduino IDE, version 1.8.0 or superior. If you don’t have it yet, you can download here https://www.arduino.cc/en/Main/Software .
2- Press the “Preferences” option to “File” menu and open the preferences window.
3- In the text box “Additional boards manager URLs”, add the direction:
http://apps.industrialshields.com/main/arduino/boards/package_industrialshields_index.json
4- Close the preferences window with the “Ok” button.
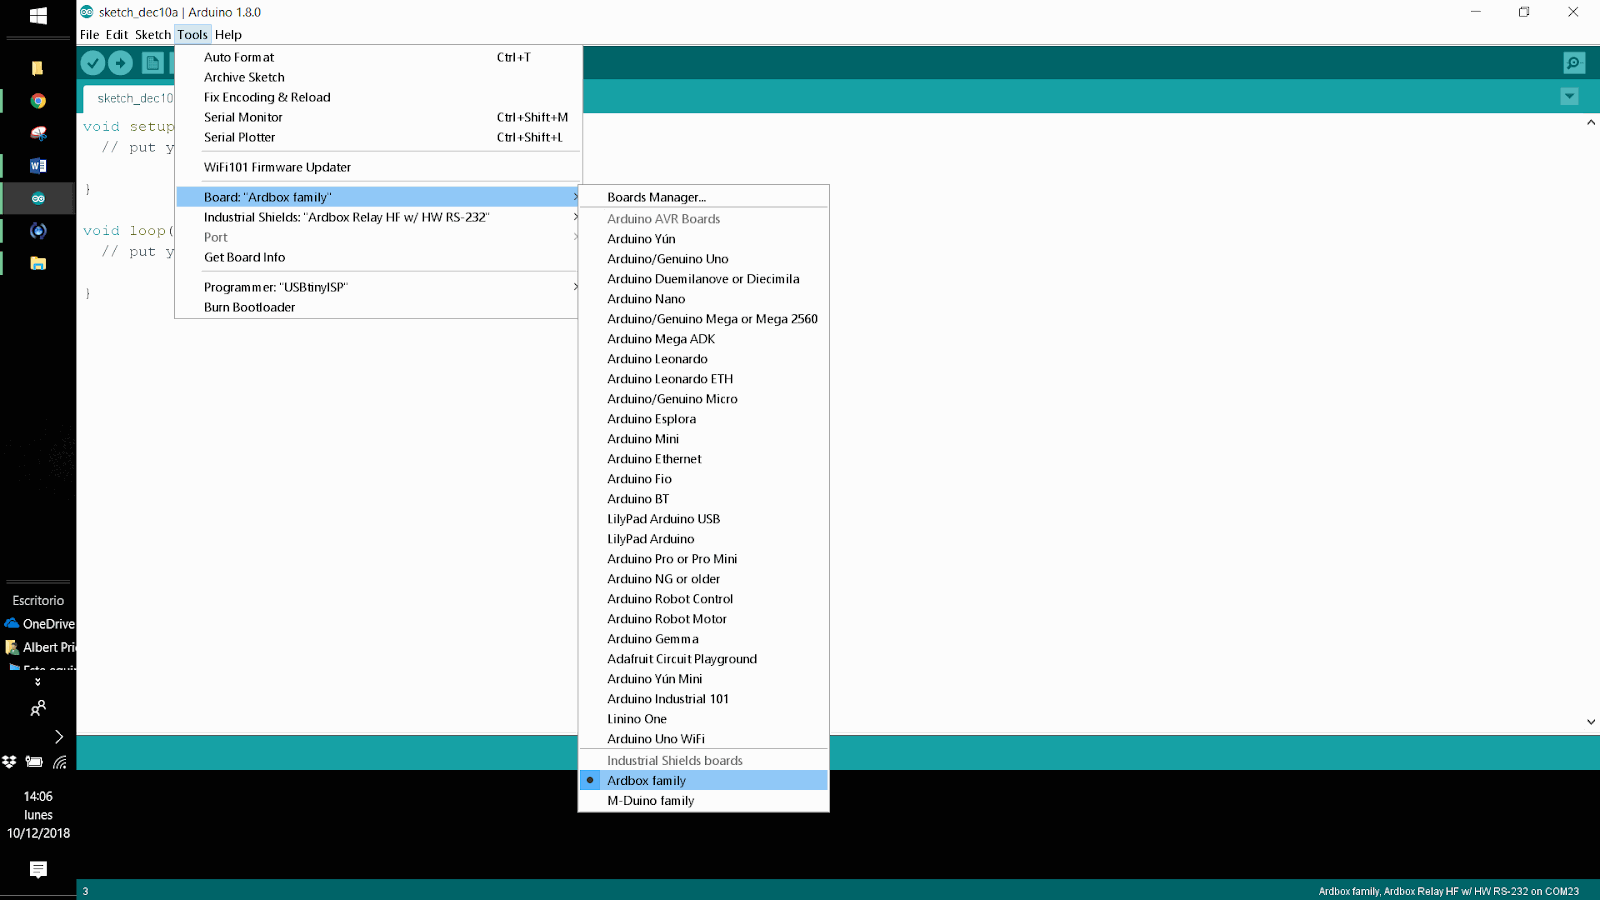
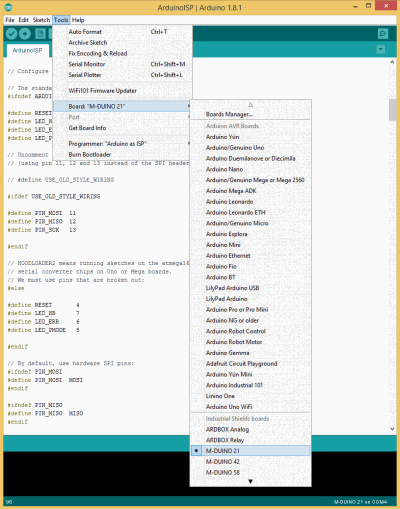
5- Click on “Tools” menu , and open the “Boards” submenu, and click the “Boards Manager” option, to open the Boards Manager window.
6- Search “industrialshields” to the search filter and select to the list and click “Install”.
7- Close the “Boards Manager”.
Once it is performed that steps, you are available to select each PLC that you wish to work on “Tools” > “Boards”: ARDBOX, M-DUINO, …

Examples of use
Once the Industrial Shields boards are installed on your Arduino IDE, you can find different usage examples for your Arduino-based Controller.
You can find them at:
“File” > “Examples” > "MDuino Family Examples
Also it is important to stand out that now it is not necessary to overwrite the w5100.h from the Ethernet library for the M-DUINO family.
See how to do it step by step in this video:
How to use the mapping pins of Industrial Shields Boards
Before using these pins it is necessary to download and install the Industrial Shields boards. If you have any issues you can start at the top of the page.

These boards provide you Industrial Shields PLC mapping. How it works?
For example, with this boards it is not necessary to figure out what Arduino pin belong to the Industrial Shields PLC. Just using directly this PLC pin, Arduino IDE will arrange the mapping for you. To reference to the Industrial Shields Pins it must be typed like this:
Digital Outputs: QX_X
Analog Outputs: AX_X
Relay Output: RX_X
Inputs (regardless if it’s analog or digital): IX_X
Next it is showed a sketch example:
// In this case is selected the M-DUINO 57R+ board (IS.MDuino.57R+),
//but the way to use the GPIOs is the same for every Industrial Shields PLC

void setup() {
   }

////////////////////////////////////////////////////////////////////////////////////////
void loop() {
  // Toggle pins once a second (I = Input Pins, Q = Digital Outputs, A = Analog Outputs & R = Relay Outputs)
  digitalRead(I0_0);//Reading a Digital Input
  analogRead(I0_8);//Reading an Analog Input

  digitalWrite(Q0_0, HIGH);//Writing a HIGH on a Digital Output
  digitalWrite(Q0_1, HIGH);//Writing a HIGH on a Digital Output
  //...
  analogWrite(A0_0, 188);//Writing on an Analog Output
  analogWrite(A0_1, 255);//Writing on an Analog Output
  //...
  digitalWrite(R0_0, HIGH);//Writing a HIGH on a Relay Output
  digitalWrite(R0_1, HIGH);//Writing a HIGH on a Relay Output
  //...
  delay(1000);

  digitalWrite(Q0_0, LOW);//Writing a LOW on a Digital Output
  digitalWrite(Q0_1, LOW);//Writing a LOW on a Digital Output
  //...
  digitalWrite(R0_0, LOW);//Writing a LOW on a relay Output
  digitalWrite(R0_1, LOW);//Writing a LOW on a relay Output
  //...

  delay(1000);
}
TCP Client on Arduino based Automation
Introduction
Read how to connect to a server TCP from Arduino based PLC. To go ahead you just need an M-Duino PLC with Ethernet connection and available TCP server .
Requirements
Ethernet PLC >>
Industrial Shields boards >>
Description
Before starting with this post, take a look at this example. It consists on implementing a TCP Server on Raspberry Pi 3 with Node.JS >>
Once the server is running, M-Duino can connect to the server. On this example it is used an M-Duino to connect with the Node.js server called server.js, the same as used on previous example link.
To configure the M-Duino, this post just follows the TCP example from Arduino web site with a few changes. To be able to connect to the server we must know the TCP server IP and the port where this server is listening.
Example
Next it is showed the Arduino code:
#include <Ethernet.h>
#include <SPI.h>

byte mac[] = { 0xBE, 0xAD, 0xBE, 0xEF, 0xFE, 0xED };
byte ip[] = { 192, 168, 1, 100 };
byte server[] = { 192, 168, 1, 105 }; // Touchberry Pi Server
int tcp_port = 5566;

EthernetClient client;

void setup()
{
  Ethernet.begin(mac, ip);
  Serial.begin(9600);

  delay(1000);

  Serial.println("Connecting...");

  if (client.connect(server, tcp_port)) { // Connection to server.js
    Serial.println("Connected to server.js");
    client.println();
  } else {
    Serial.println("connection failed");
  }
}

void loop()
{
  if (client.available()) {
    if(Serial.available()){
      char s = Serial.read();
      client.write(s); // Send what is reed on serial monitor
      char c = client.read();
      Serial.print(c); // Print on serial monitor the data from server
    }
  }

  if (!client.connected()) {
    Serial.println();
    Serial.println("disconnecting.");
    client.stop();
    for(;;)
      ;
  }
}
For more information see on Arduino web site the TCP functions Ethernet / Ethernet 2 library
Once the sketch is running on the M-Duino, through the serial monitor it’s possible to send data to the server and this data is replied and printed also on serial monitor. On this example is typed “Hello server.js” to the serial monitor. Next is showed two screenshot with the response of this operation, one of the server.js on the Raspberry and second of the M-Duino serial monitor:

