Introduction
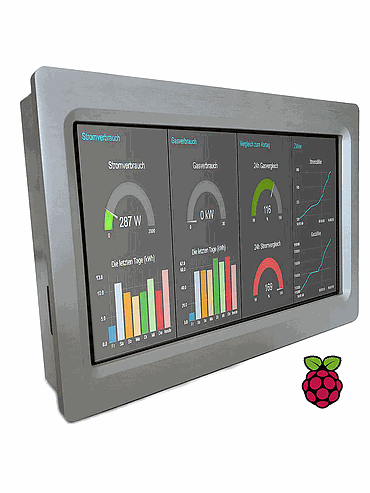
Node-RED is a programming tool to wire together hardware devices, APIs and online services in new and interesting ways.
It provides a browser-based editor that makes it easy to wire together flows using the wide range of nodes in the palette that can be deployed to its runtime in a single-click.
As it is quite fascinating to use for open source projects, you are going to learn how to get GPS coordinates from your SIM7600E module and put them in a Google Maps Widget in Node-RED Dashboard.
Related links
Explanation
In this post, you will learn how to get GPS coordinates with a Map Widget from Node-RED. Let's continue the post below:
👉 How to get GPS location on Panel PC Read >>
Installing and Upgrading Node-RED
sudo apt install build-essential git
bash <(curl -sL https://raw.githubusercontent.com/node-red/linux-installers/master/deb/update-nodejs-and-nodered)
The script above will:
- Remove the pre-packaged version of Node-RED and Node.js if present.
- Install the current Node.js LTS release using the NodeSource. If it detects Node.js is already installed from NodeSource, it will ensure it is at least Node 8, but otherwise it will leave it alone.
- Install the latest version of Node-RED using npm.
- Optionally, install a collection of useful Pi-specific nodes.
- Setup Node-RED to run as a service and provide a set of commands to work with the service.
Autostart on boot
If you want Node-RED to run when the Pi is turned on, or re-booted, you can enable the service to autostart by running the command:
sudo systemctl enable nodered.service
To disable the service, run the command:
sudo systemctl disable nodered.service
To know more about Node-RED installation, check out the following link:
👉 Running on Raspberry Pi Read >>
GPSD
Go to the Side Tab Menu > Click on Manage Palette > Install > Type "gpsd" > Install the node-red-contrib-gpsd package:
Install Map nodes
Now, you are going to install some nodes for the Map Widget.
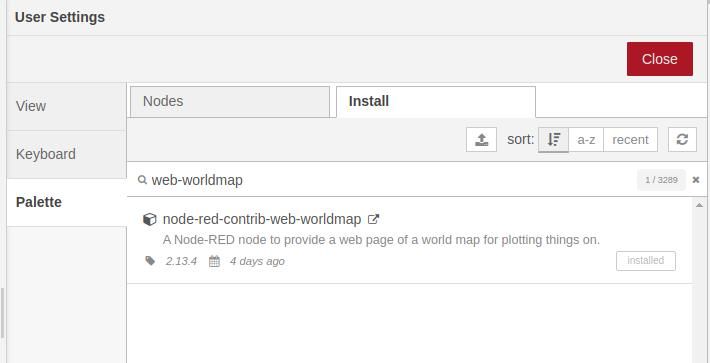
Go to the Side Tab Menu > Click on Manage Palette > Install > Type "web-worldmap" > Install the node-red-contrib-web-worldmap package:
Getting GPS Coordinates

You will see that you will start receiving data immediately, every second. So, if you want to control that time, just add a Delay node between the Adafruit Ultimate GPS node and the switch node, with the configuration you want. For example, try receiving 1 msg every 5 seconds, and drop intermediate messages.
Add the WorldMap node
Once you get all the GPS data, you are going to add two world map nodes so that it displays in the Dashboard correctly:
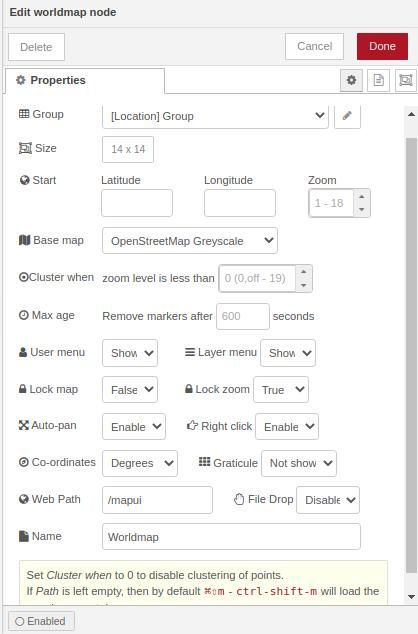
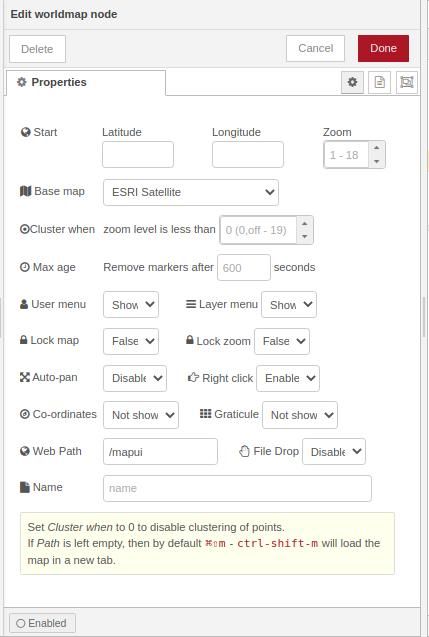
If you take a look at the node help documentation, the minimum msg.payload from the worldmap nodes, must contain name, lat and lon properties.
E.g. { "name": "John", "lat": 41.45, "lon": 1.53 }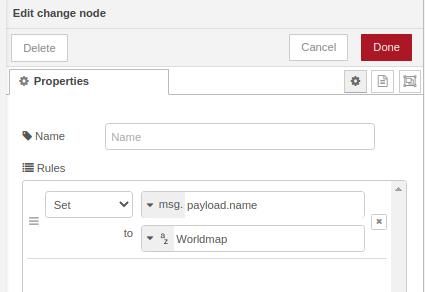
Connect this to the world map node as shown below:
And go to your Dashboard to check your map with your location! Your flow should something be like this:
[{"id":"6e545ede.d4925","type":"tab","label":"Flow 1","disabled":false,"info":""},{"id":"7a97b4c5.876cfc","type":"gpsd","z":"6e545ede.d4925","name":"Adafruit Ultimate GPS","hostname":"0.0.0.0","port":"2947","tpv":true,"sky":true,"info":false,"device":true,"gst":false,"att":false,"x":140,"y":200,"wires":[["6560f5f6.c0ed8c"]]},{"id":"6560f5f6.c0ed8c","type":"switch","z":"6e545ede.d4925","name":"","property":"payload.class","propertyType":"msg","rules":[{"t":"eq","v":"TPV","vt":"str"}],"checkall":"true","repair":false,"outputs":1,"x":350,"y":200,"wires":[["4d22a0bd.63dda"]]},{"id":"2cf3ed7c.bd6ad2","type":"ui_worldmap","z":"6e545ede.d4925","group":"88f77589.0122d8","order":2,"width":"14","height":"14","name":"Worldmap ","lat":"","lon":"","zoom":"","layer":"OSM grey","cluster":"","maxage":"","usermenu":"show","layers":"show","panit":"true","panlock":"false","zoomlock":"true","hiderightclick":"false","coords":"deg","showgrid":"false","allowFileDrop":"false","path":"/mapui","x":710,"y":120,"wires":[]},{"id":"4d22a0bd.63dda","type":"change","z":"6e545ede.d4925","name":"","rules":[{"t":"set","p":"payload.name","pt":"msg","to":"Worldmap","tot":"str"}],"action":"","property":"","from":"","to":"","reg":false,"x":540,"y":200,"wires":[["23b5e03.345882"]]},{"id":"23b5e03.345882","type":"worldmap","z":"6e545ede.d4925","name":"","lat":"","lon":"","zoom":"","layer":"Esri Satellite","cluster":"","maxage":"","usermenu":"show","layers":"show","panit":"false","panlock":"false","zoomlock":"false","hiderightclick":"false","coords":"none","showgrid":"false","allowFileDrop":"false","path":"/mapui","x":730,"y":200,"wires":[]},{"id":"88f77589.0122d8","type":"ui_group","name":"","tab":"c4c17961.4519f8","order":1,"disp":true,"width":15,"collapse":false},{"id":"c4c17961.4519f8","type":"ui_tab","name":"Location","icon":"dashboard","disabled":false,"hidden":false}]
.jpg?access_token=375d4233-2c89-4153-914b-16f328edc367)
Node-RED tutorial: How to get GPS coordinates with a Maps Widget