Introduction
Requirements
- Raspberry Pi industrial PLC >
- Power Supply >
- Saleae Logic Analyzer >
- 3 female to female jumper wires >
How to connect Logic Analyzer & Raspberry PLC
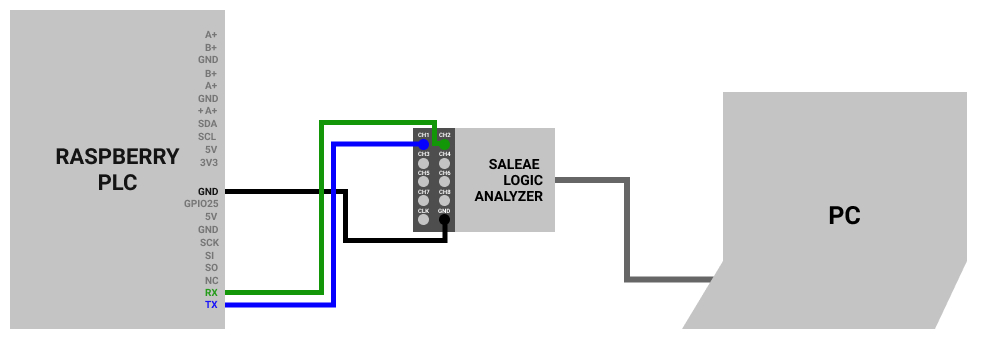
First of all, we are going to set the connections. Connect the hardware, as you can see in the table and picture below:
| RASPBERRY PLC | SALEAE LOGIC ANALYZER | LAPTOP |
| GND | GND | |
| TX | CHANNEL 1 | |
| RX | CHANNEL 2 | |
| USB | USB |

Send data through Serial Port
From the open source PLC Raspberry Pi, we are going to execute a very basic test about sending data through the Serial Port. You can use the industrial automation programming language that you like the most. We are going to send an 'a' using a bash script.
1. Access to your Raspberry PLC.
2. Create a file called test.sh
touch test.sh
3. Give permissions to the file:
chmod 755 test.sh
4. Edit your file and add this code:
#!/bin/bash
stty 115200 -F /dev/ttyS0
while [ 1 ] ; do
        echo -ne "a" > /dev/ttyS0
        sleep 0.5
done
5. Run the script:
sudo ./test.sh
Install Saleae Logic Analyzer Software
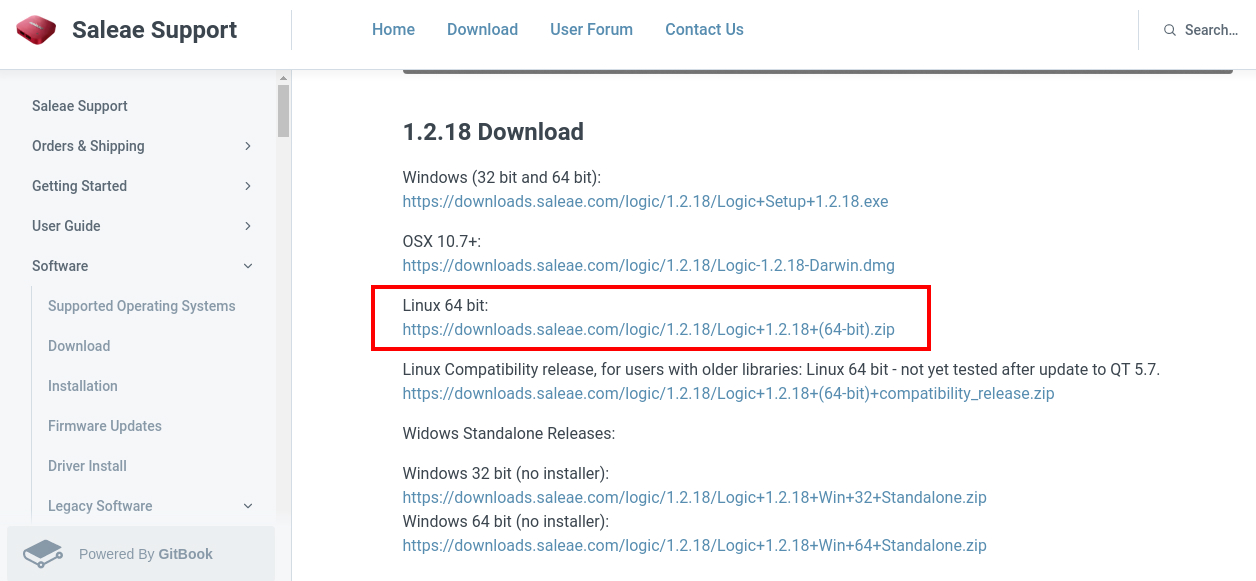
Once the hardware is correctly connected and you are sending data from the Raspberry Programmable Logic Controller's serial port, you can go to Saleae's website > and download the package that fits you better. In our case, we are going to download the Linux 64 bit .zip

Click on it and download it. Once downloaded, extract files and double-click on the Logic file to launch the software.
Launch the Logic Analyzer Software
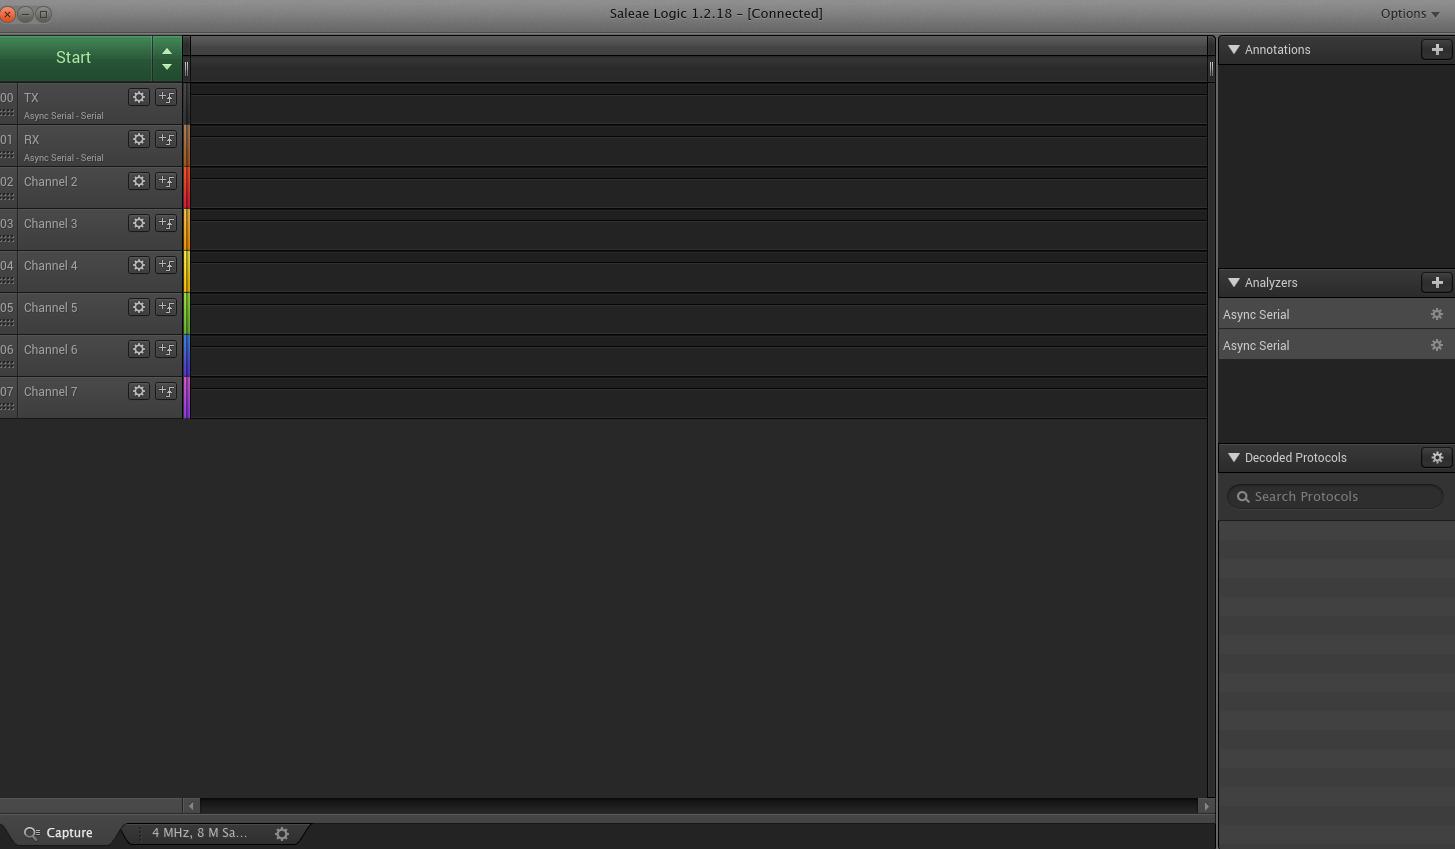
Once you launch the software, you should see a window like this:

You can see the 8 channels on the left, and another panel on the right.
1. Select channel 00 and name it TX.
2. By the channel 0 selected, click on the symbol next to Analyzers of the panel on the right > Async Serial.
3. Select Serial 0 - 'TX'.
4. Set the same baud rate as in the Raspberry code. In our case: 115200. Leave the rest by default. Click on Save.
5. Do the same for the RX, from steps 1 to 4.
6. Go to the Start button and click on the arrows. Select 4Ms/s and 2 seconds, as there is a 0.5 delay in our code, and will allow seeing 4 incoming data.
7. Click on any place.
8. Click on the Start button.
9. Get your data!

Data Representation
The points from the frame received represents the bits from the data in little-endian, so the least significant bit (also LSB) will be the first one to be read.
In this case, we can see that we get a 10000110 but read as a little-endian like 01100001, so if we convert this to hexadecimal, we get 61, which is an 'a' in ASCII.
Now, explore the logic analyzer software and explore all the possibilities it offers with Raspberry Pi automation! Check it out >
How to Open Logic Analyzer & Serial Port with industrial Raspberry PLC