
Introduction
RS-485 is a robust and versatile standard for industrial communication, enabling long-distance data transfer with high resistance to electrical noise. It is widely used in automation systems, especially when connecting multiple devices or controllers. This tutorial will guide you through setting up and testing RS-485 communication on an Industrial Shields Raspberry PLC.
With its built-in RS-485 ports, the Raspberry PLC supports both half-duplex and full-duplex modes, making it adaptable to various industrial scenarios. In this guide, we will cover the hardware requirements, wiring setup, and essential software commands to configure and test RS-485 communication. Whether you're working with V3, V4, or V6 versions, this tutorial ensures a smooth setup and successful communication test.
Requirements
Hardware
- Raspberry PLC
- Power supply (12 - 24V)
- B or micro B type cable, to program the Arduino / ESP32 based PLC
- Two twisted pair cables, for RS485
Software
Hardware
The Industrial Shields Raspberry PLC is equipped with two RS-485 ports that support half-duplex communication. To enable full-duplex communication, you can use both ports simultaneously, one for transmitting data and the other for receiving. The communication setup options are as follows:
- Half-Duplex (HD) using A1+ and B1-.
- Full-Duplex (FD) using A1+, B1-, A2+ and B2-.
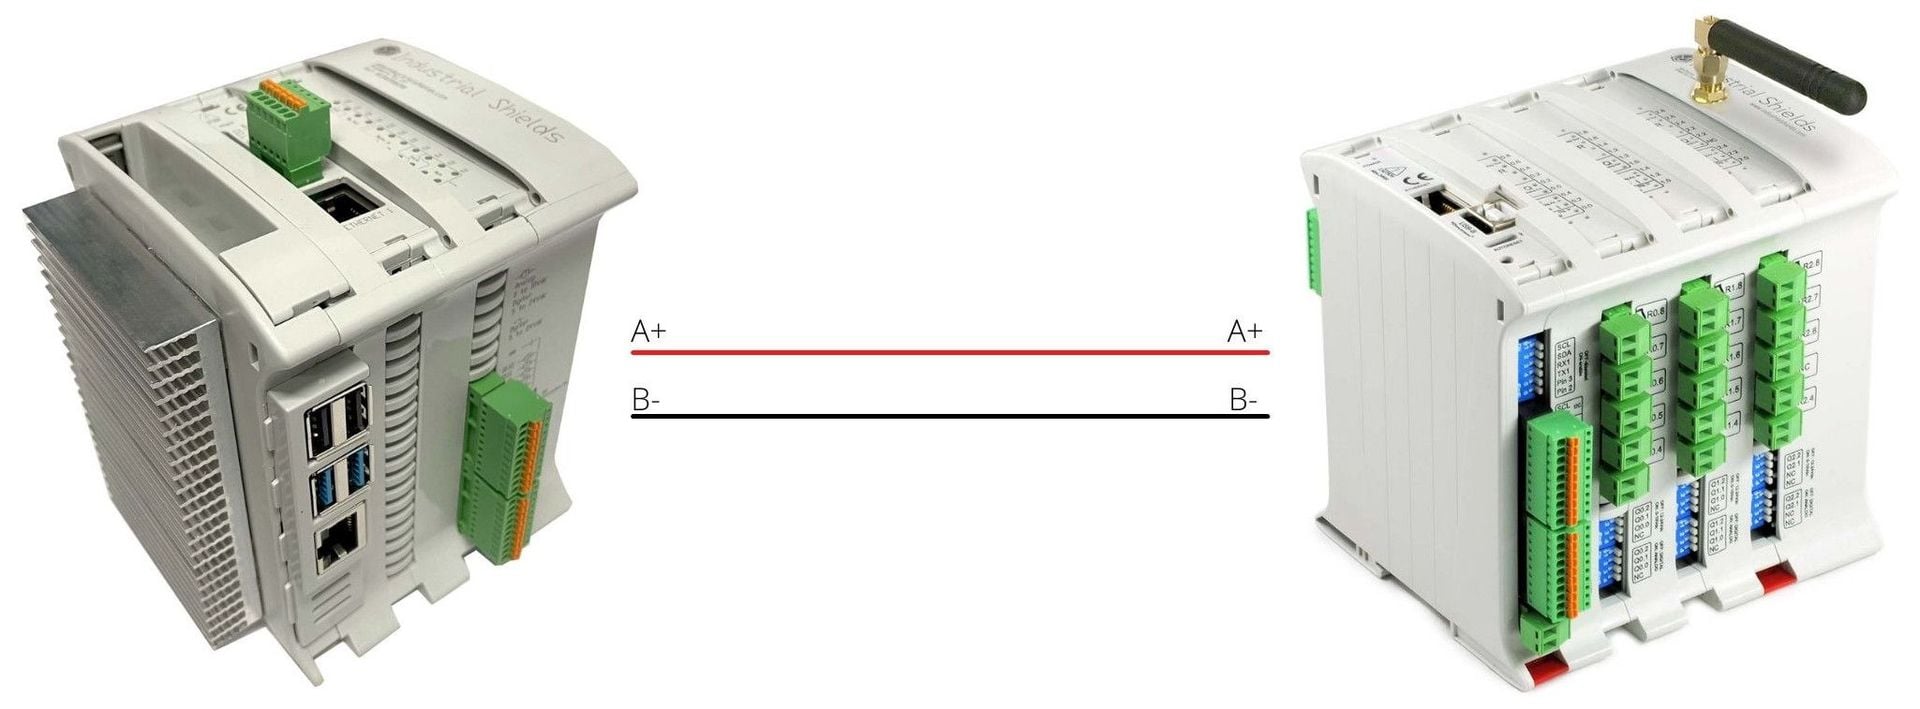
Connections
- For HD communication: A+ with A+ and B- with B-.
- For FD communication: A+ with Y+, B- with Z-, Y+ with A+ and Z- with B-.
Software
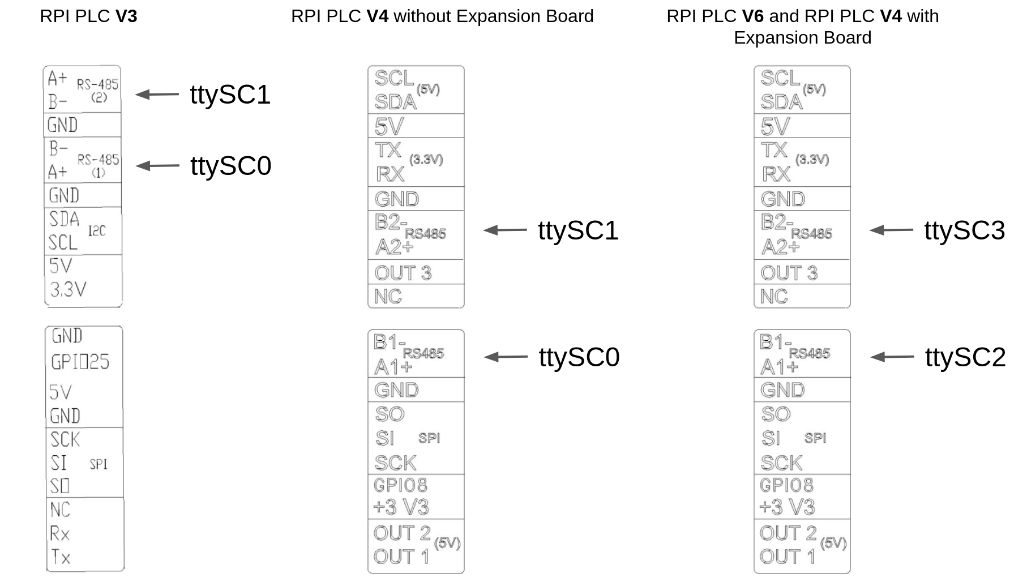
The port references vary depending on the Raspberry PLC version and whether expansion boards are used:
- V3 and V4 without expansion board: Ports /dev/ttySC0 and /dev/ttySC1.
- V6 and V4 with expansion board: Ports /dev/ttySC2 and /dev/ttySC3.
Functionalities
Configure port
To configure a serial port for RS-485 communication, use the following command:
stty 115200 -F [PORT] raw -echo
Replace [PORT] with the appropriate port for your Raspberry PLC version.
Receive data
To receive data through an RS-485 port, execute:
cat [PORT]
Replace [PORT] with the correct port.
Send data
To send data, use the following command:
echo "DATA" > PORT2
Replace [PORT] with the correct port and replace "DATA" with the message you want to send.
Verification Test
Follow these steps to perform a quick verification test of the RS-485 functionality on a Raspberry PLC:
1. Power the PLC between 12 and 24V and connect the following wires:
- A1+ to A2+
- B1- to B2-
2. Initialize both serial ports to the same baud rate (e.g., 115200)
stty 115200 -F [PORT1] raw -echo
stty 115200 -F [PORT2] raw -echo
3. Listen for incoming data on PORT1:
cat PORT1
4. Send data from PORT2 and verify reception on PORT1:
echo "OK" > PORT2
5. Test bidirectional communication: Send data from PORT1 to PORT2 and confirm it is received.