Introduction
In this post, we are going to explain how to do the basics when working with internal relays of Industrial Shields' Programmable Logic Controllers. Reading this post, you will be able to understand how to connect and configure the analog inputs of your industrial Arduino PLC controller.
Previous reading
We recommend you to read the following blogs in order to understand the program of this blog. We used the following blog posts to do this example:
How to program your industrial PLC with Arduino IDE: Installing the Industrial Shields's boards in the Arduino ID
Requirements
In order to work with relays, you will need any of our industrial controllers for industrial automation that have relay capabilities.
Relay characteristics
There is only one kind of relay in our PLC. These relays have the following characteristics:
Up to 5A working up to 250Vac
Up to 3A working up to 30Vdc
The next draw shows how to identify the relays GPIO:

Relay
Hardware
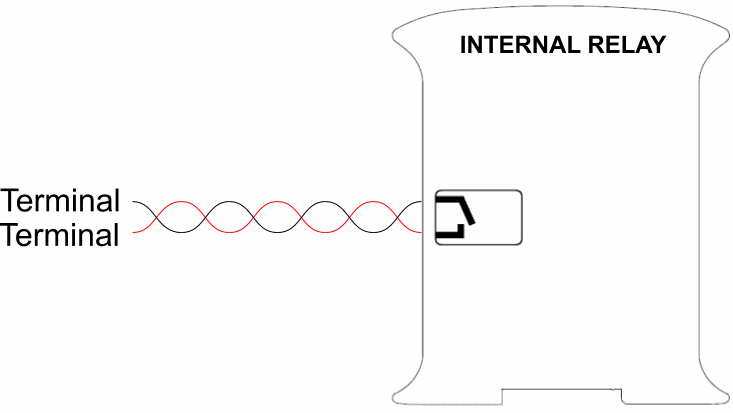
The internal relays do not have polarity. They must be connected like this:

Software
To program the internal relays, we must keep in mind we can write the values using the following command:
digitalWrite(relay,value);"Relay" must be the reference of the objective relay. The Ardbox family has the reference as "R1", and for example, the M-Duino family has the reference as "R0.1" with the relay. We must write "HIGH" or "LOW" in the "value" parameter. "HIGH" is equivalent to a relay closed, and "LOW" is equivalent to an opened relay.
digitalWrite(R1,HIGH);// Ardbox familydigitalWrite(R0_3,LOW); // M-Duino family
Examples
You can see how to handle an internal relay in theArdbox familyin the next example below:
// Internal relay example in Ardbox family// Set the speed of the serial port
// This example writes the R1 and shows via serial the state
// Setup function
void setup()
{Serial.begin(9600UL);}Serial.println("Opening");
// Loop function
void loop()
{
digitalWrite(R1, HIGH);
delay(1000);Serial.println("Closing");digitalWrite(R1, LOW);
delay(1000);}
The next one shows how to handle an internal relay in theM-Duino family:
// Internal relay example in M-Duino family// Set the speed of the serial port
// This example writes the R0_1 and shows via serial the state
// Setup function
void setup()
{Serial.begin(9600UL);}Serial.println("Opening");
// Loop function
void loop()
{
digitalWrite(R0_1, HIGH);
delay(1000);Serial.println("Closing");digitalWrite(R0_1, LOW);
delay(1000);}
Learning the basics about internal relays of an industrial PLC