Introduction
Smart lighting is a lighting technology designed for energy efficiency, convenience and security. This may include high efficiency fixtures and automated controls that make adjustments based on conditions such as occupancy or daylight availability. Lighting is the deliberate application of light to achieve some aesthetic or practical effect. It includes task lighting, accent lighting, and general lighting.
Our company takes part in this area helping out to apply new technology for the lights management!
Related links
- Raspberry PLC >>>
- Power Supply >>>
- Lighting device
Smart lighting
Smart Lighting, like other home automation functions, provides a more efficient way to manage the lighting in any space. The main objective is to promote an efficient use of resources, which reduces both private spending (bills, spare parts ...), and the resources themselves (materials, electricity ...).
The are many different kind of lights, more or less complex, some of them can be connected directly to an output of the Raspberry PLC, and some of them may need a driver in between, or even an external hardware.
In order to make a basic example, we are going to show you how to detect when it gets dark, without any sensor, how to activate an output during the nighttime and how to automatically deactivate it in the sunrise.
Prior checking: Node-RED
First of all, let's do some prior checking to make that Node-RED is rightly installed onto your Raspberry PLC:
1. Make sure that Node-RED is rightly installed in your Raspberry PLC:
a. If it is a service, type the following in the commandline:
sudo systemctl status nodered.service
b. If it is not a service, but it is installed, start it:
node-red-start
c. If it is not installed, execute the following command to install Node.js, npm and Node-RED onto a Raspberry Pi:
bash <(curl -sL https://raw.githubusercontent.com/node-red/linux-installers/master/deb/update-nodejs-and-nodered)
NODE-RED-CONTRIB-NIGHTTIME
If you do not know yet how Node-RED works, we recommend you to take a look at our Node-RED course Go >>>
Otherwise, the first thing you should do in order to create the flow, is to download the node-red-contrib-nighttime.
1. So, go to the Menu > Manage Palette > Install > Type: node-red-contrib-nighttime > Once you find it, click on Install.
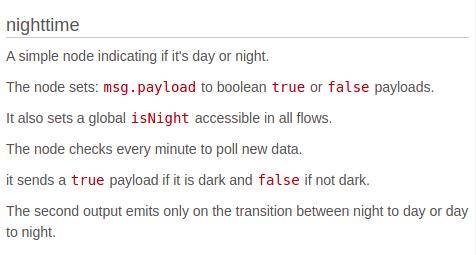
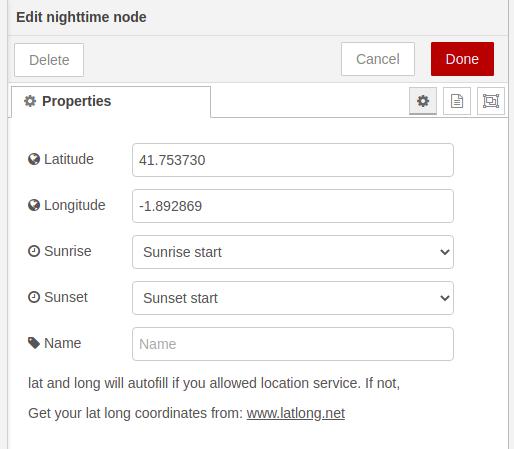
If we take a look at the documentation of the node, this is what we will see, and this is how it looks like internally:


You only have to go to type your latitude and longitude and choose an option to determine what is the moment of the sunrise you want to determine. The same with the sunset.
Since the node identifies the nighttime, it will send a FALSE during the day, and a TRUE during the night.
So, if we get that false value and we send it to a write digital output node from Industrial Shields, while it is day, the digital write it will be OFF and it will be ON during the night.
Testing
And how do we do that with a practical example? Let's see it!
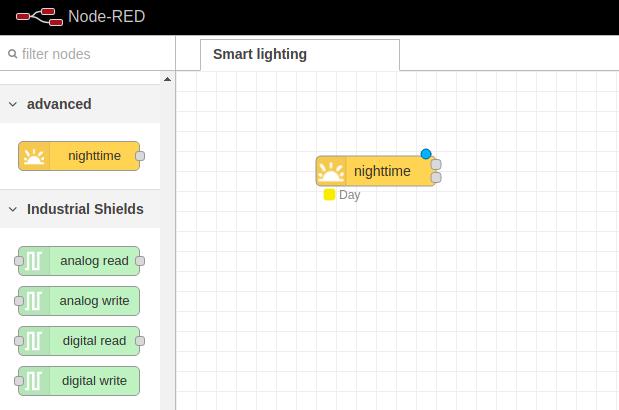
1. First of all, drag and drop the nighttime node to the flow.

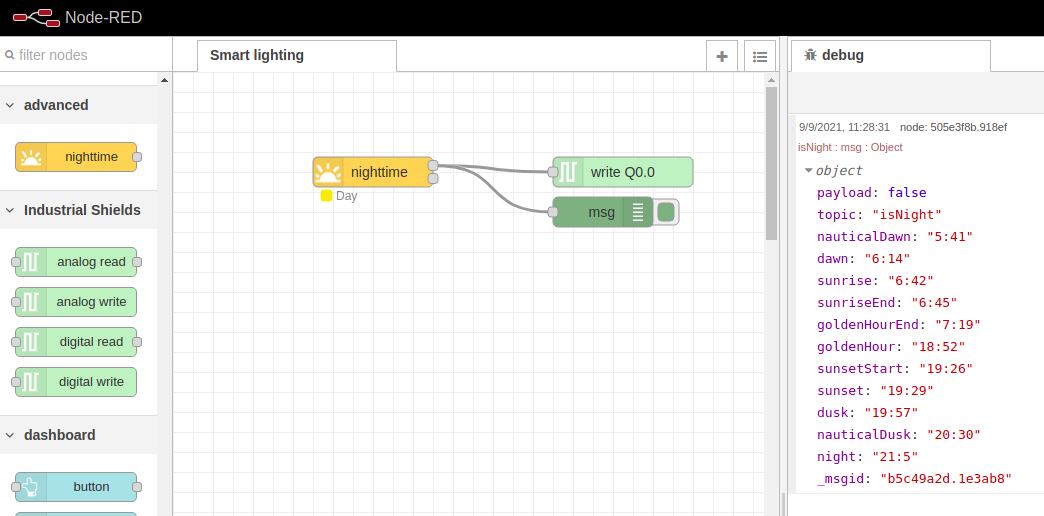
As you could see in the node help, there are two outputs from the nighttime node:
In our case, we are going to wire a digital write node from Industrial Shields to the first output to be able to control a specific output from your Raspberry PLC every minute.
As the digital write node accepts boolean values, set the value field to a dash ( - ) so that it accepts to change its value: HIGH or LOW depending of the incoming payload: either true or false.

[{"id":"e4159a13.791338","type":"tab","label":"Smart lighting","disabled":false,"info":""},{"id":"e3049ba0.904ba8","type":"rpiplc-config","model":"RPIPLC_21","name":""},{"id":"9882cc2c.3cb1d","type":"ui_tab","name":"Home","icon":"dashboard","disabled":false,"hidden":false},{"id":"c33d895f.e9ebf8","type":"ui_base","theme":{"name":"theme-light","lightTheme":{"default":"#0094CE","baseColor":"#0094CE","baseFont":"-apple-system,BlinkMacSystemFont,Segoe UI,Roboto,Oxygen-Sans,Ubuntu,Cantarell,Helvetica Neue,sans-serif","edited":true,"reset":false},"darkTheme":{"default":"#097479","baseColor":"#097479","baseFont":"-apple-system,BlinkMacSystemFont,Segoe UI,Roboto,Oxygen-Sans,Ubuntu,Cantarell,Helvetica Neue,sans-serif","edited":false},"customTheme":{"name":"Untitled Theme 1","default":"#4B7930","baseColor":"#4B7930","baseFont":"-apple-system,BlinkMacSystemFont,Segoe UI,Roboto,Oxygen-Sans,Ubuntu,Cantarell,Helvetica Neue,sans-serif"},"themeState":{"base-color":{"default":"#0094CE","value":"#0094CE","edited":false},"page-titlebar-backgroundColor":{"value":"#0094CE","edited":false},"page-backgroundColor":{"value":"#fafafa","edited":false},"page-sidebar-backgroundColor":{"value":"#ffffff","edited":false},"group-textColor":{"value":"#1bbfff","edited":false},"group-borderColor":{"value":"#ffffff","edited":false},"group-backgroundColor":{"value":"#ffffff","edited":false},"widget-textColor":{"value":"#111111","edited":false},"widget-backgroundColor":{"value":"#0094ce","edited":false},"widget-borderColor":{"value":"#ffffff","edited":false},"base-font":{"value":"-apple-system,BlinkMacSystemFont,Segoe UI,Roboto,Oxygen-Sans,Ubuntu,Cantarell,Helvetica Neue,sans-serif"}},"angularTheme":{"primary":"indigo","accents":"blue","warn":"red","background":"grey"}},"site":{"name":"Node-RED Dashboard","hideToolbar":"false","allowSwipe":"false","lockMenu":"false","allowTempTheme":"true","dateFormat":"DD/MM/YYYY","sizes":{"sx":48,"sy":48,"gx":6,"gy":6,"cx":6,"cy":6,"px":0,"py":0}}},{"id":"f8ee617d.10b9b","type":"rpiplc-digital-write","z":"e4159a13.791338","rpiplc":"e3049ba0.904ba8","pin":"Q0.0","value":"","name":"","x":450,"y":100,"wires":[]},{"id":"fec2f4cd847548e2","type":"nighttime","z":"e4159a13.791338","name":"","lon":"-1.823350","lat":"41.725182","start":"sunrise","end":"sunsetStart","x":200,"y":100,"wires":[["f8ee617d.10b9b","505e3f8b.918ef"],[]]},{"id":"505e3f8b.918ef","type":"debug","z":"e4159a13.791338","name":"","active":true,"tosidebar":true,"console":false,"tostatus":false,"complete":"true","targetType":"full","statusVal":"","statusType":"auto","x":430,"y":140,"wires":[]}]
With this very basic example, you can detect the nighttime depending on your latitude and longitude, and turn on and off every single element that is connected to the outputs of your Raspberry PLC.
Now, it is your turn! Try with different elements and explore all the possibilities >>>
Node-RED Tutorial: How to automate lights with Raspberry PLC