Introduction
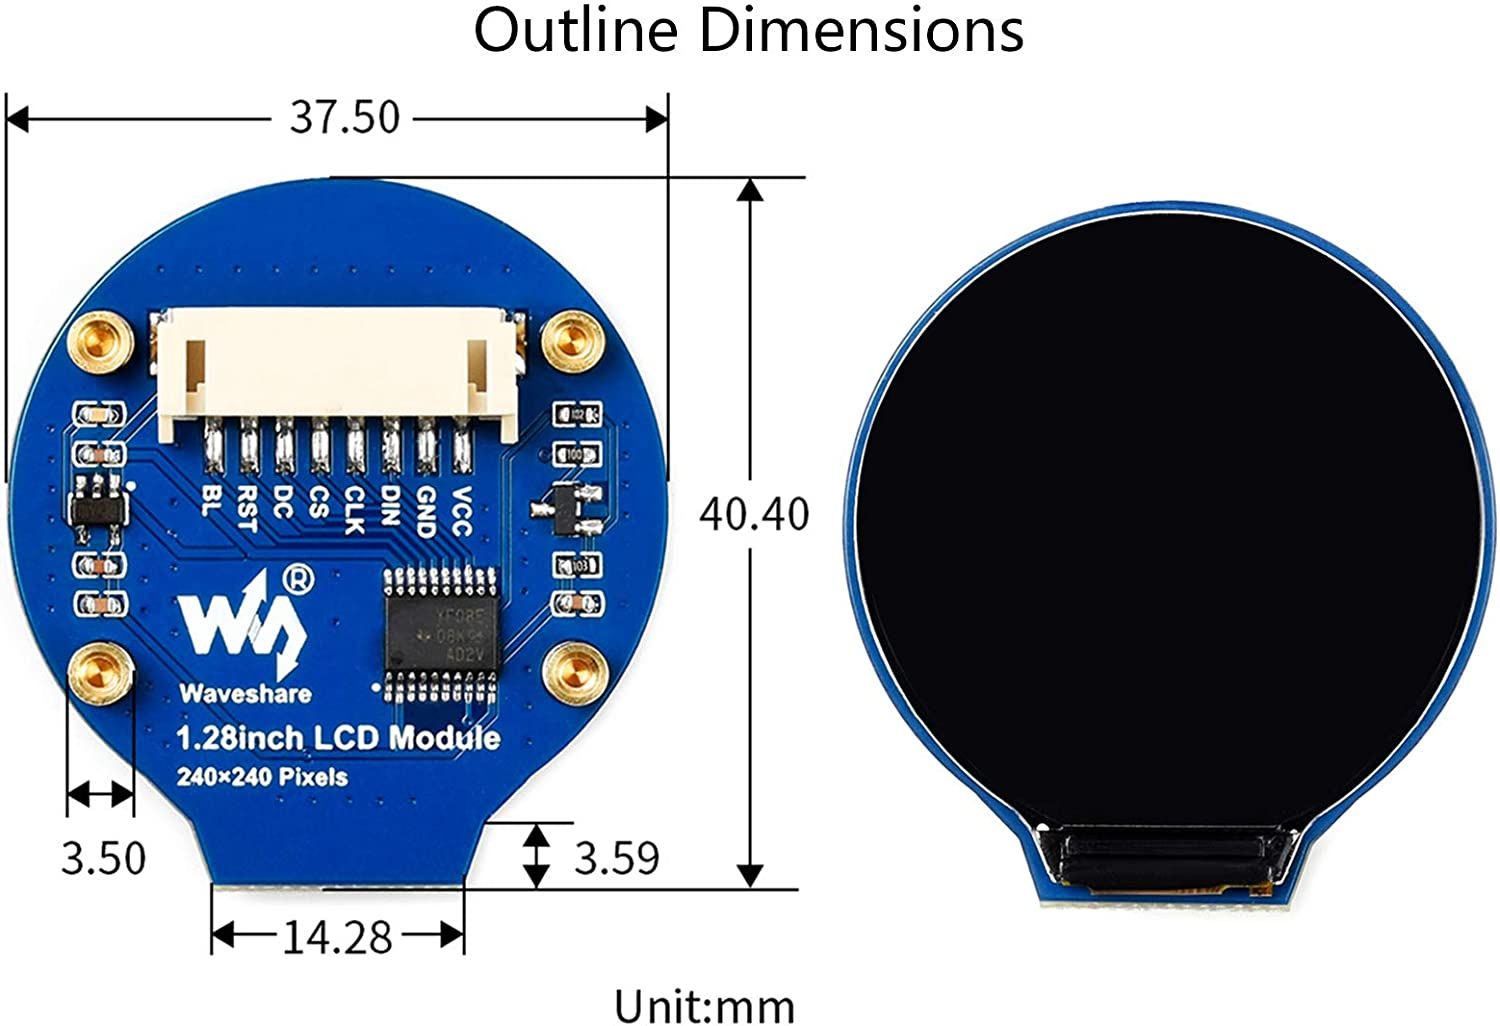
1.28" round LCD display module from WaveShare is a module with an embedded GC9A01 driver, 65K RGB colors, 240×240 Resolution and using SPI bus and interface. Minimizes required IO pins, supports controller boards like Raspberry Pi/Jetson Nano/Arduino/STM32 and comes with development resources, like examples for Raspberry Pi, Arduino and STM32.
In this post, you are going to display sample pictures in your 1.28” round LCD Display Module for industrial control.

Related Links
Requirements
- Raspberry Pi
- 1.28inch LCD module from WaveShare
- Either HDMI cable or Ethernet cable to connect to your Raspberry Pi.
Explanation
SPI
Serial Peripheral Interface (SPI) is an interface bus commonly used to send data between microcontrollers and small peripherals such as shift registers, sensor, and SD cards. It uses separate clock and data lines, along with a select line to choose the device you wish to talk to. In the picture below, you can see a single master and a single slave on a Serial Peripheral Interface (SPI) bus.
.jpg?access_token=172c6c64-8390-4f0d-bfbd-244f2472a188)
Steps
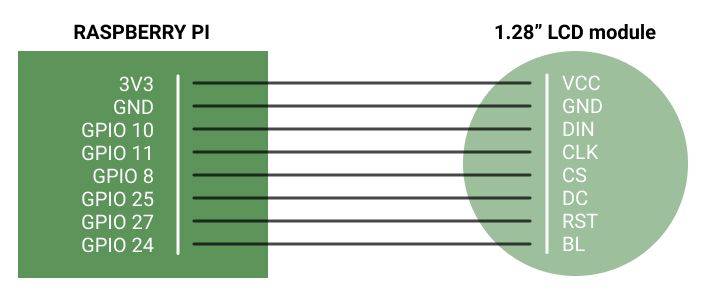
1. First of all, connect your Raspberry Pi and 1.28" LCD module as shown in the picture below.

Enable SPI interface
2. Then, power up your Raspberry Pi and connect through Ethernet or HDMI. In our case, we are going to connect through SSH:
3. Run the following command to enter the configuration page.
sudo raspi-config
4. Enable the SPI interface. Go to Interfacing Options > SPI > Yes.
5. Reboot your Raspberry Pi:
sudo reboot
Install Libraries
wget http://www.airspayce.com/mikem/bcm2835/bcm2835-1.68.tar.gz
7. Extract the files.
tar zxvf bcm2835-1.68.tar.gz
8. Change to the bcm2835-1.68 directory.
cd bcm2835-1.68/
9. Run the configured script and compile.
sudo ./configure
sudo make
sudo make check
sudo make install
sudo apt install wiringpi
For the version of the Raspberry Pi system after May 2019 an upgrade may be required.
wget https://project-downloads.drogon.net/wiringpi-latest.deb
sudo dpkg -i wiringpi-latest.deb
gpio -v
11. Install Python Libraries. Install the one that fits with your Raspberry Pi version.
Pyhton 2
#python2
sudo apt-get update
sudo apt-get install python-pip
sudo apt-get install python-pil
sudo apt-get install python-numpy
sudo pip install RPi.GPIO
sudo pip install spidev
Pyhton 3
#python3
sudo apt-get update
sudo apt-get install python3-pip
sudo apt-get install python3-pil
sudo apt-get install python3-numpy
sudo pip3 install RPi.GPIO
sudo pip3 install spidev
Download examples
12. Run the following commands to install p7zip-full package.
sudo apt-get install p7zip-full
13. Download the demo codes.
sudo wget https://www.waveshare.net/w/upload/a/a8/LCD_Module_RPI_code.7z
14. Extract the files.
7z x LCD_Module_RPI_code.7z -O./LCD_Module_code
15. Change to Raspberry Pi Directory.
cd LCD_Module_code/RaspberryPi/
C codes
16. Go to the LCD_Module_code/RaspberryPi/c directory and re-compile the demo codes.
Excd c
sudo make clean
sudo make -j 8
Waveshare code examples are made for multi-display. So you can input the type of LCD when using. In our case, we are going to run the command according to our 1.28inch LCD module.
sudo ./main 1.28
Python codes
17. To run the Raspberry demo examples, go to the directory demo examples from Python:
cd LCD_Module_code/RaspberryPi/python/example
Likewise as with the C codes, these examples are made for multi-display, so you can also run the examples for different modules. In our case, if you havePython version 2, run the following:
sudo python 1inch28_LCD_test.py
In case of Python3, run the following command:
sudo python3 1inch28_LCD_test.py
1.28" LCD Display Module & Raspberry Tutorial