Introducción
El IDE de Arduino y el entorno tiene muchos controladores y bibliotecas disponibles al alcance de las armas, pero el entorno Arduino se limita a solo setup() y loop() y no es compatible con multitarea de manera efectiva.
La mayoría de los sistemas operativos parecen permitir que se ejecuten varios programas o subprocesos al mismo tiempo. Esto se denomina multitarea. En realidad, cada núcleo del procesador sólo puede ejecutar un solo programa en un momento dado. Una parte del sistema operativo llamada programador es responsable de decidir qué programa ejecutar cuando, y proporciona la ilusión de la ejecución simultánea cambiando rápidamente entre cada programa.
Esta es un simple aplicación de uso y robusta implementación de FreeRTOS que puede simplemente encajar en el IDE de Arduino como una biblioteca y permitir el uso de las mejores partes de ambos entornos , perfectamente.
Requirements
Uso de FreeRTOS en automatización industrial
Fuera de la caja, el Arduino IDE no es compatible con la multitarea de forma eficaz. La buena noticia es que es fácil agregar soporte a través de una librería al Arduino IDE.
La mayoría de los sistemas operativos parecen permitir que se ejecuten varios programas o subprocesos al mismo tiempo. Esto se denomina multitarea .En realidad, cada núcleo del procesador sólo puede ejecutar un solo programa en un momento dado. Una parte del sistema operativo llamada programador es responsable de decidir qué programa ejecutar cuando, y proporciona la ilusión de la ejecución simultánea cambiando rápidamente entre cada programa.
El primer paso entonces, es instalar la biblioteca FreeRTOS para Arduino en nuestro IDE.
Si nunca ha instalado una biblioteca adicional de Arduino IDE, puede seguir los pasos que se muestran en el Arduino website.
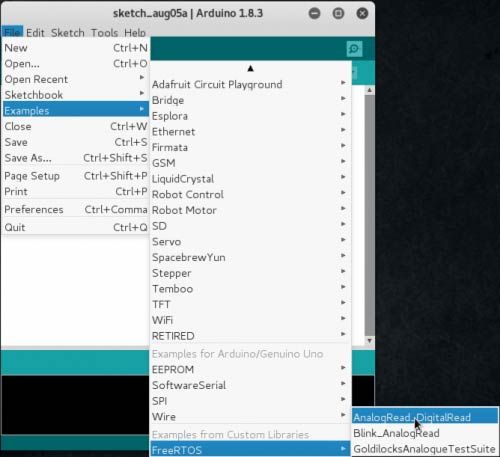
Ahora que la biblioteca ya está instalada en nuestro IDE de Arduino, podemos acceder a los ejemplos que la propia biblioteca nos proporciona.
Para acceder a los ejemplos de tutoriales de FreeRTOS Arduino, puede seguir la imagen que se muestra a continuación:
Software
Este es el codigo de ejemplo de AnalogRead_DigitalRead.
I0_0 - Entrada digital (Interruptor/Botón)
I0_1 - Entrada analógica (sensor/potenciómetro)
#include <Arduino_FreeRTOS.h>
#include <semphr.h> // add the FreeRTOS functions for Semaphores (or Flags).
// Declare a mutex Semaphore Handle which we will use to manage the Serial Port.
// It will be used to ensure only only one Task is accessing this resource at any time.
SemaphoreHandle_t xSerialSemaphore;
// define two Tasks for DigitalRead & AnalogRead
void TaskDigitalRead( void *pvParameters );
void TaskAnalogRead( void *pvParameters );
// the setup function runs once when you press reset or power the board
void setup() {
// initialize serial communication at 9600 bits per second:
Serial.begin(9600);
while (!Serial) {
; // wait for serial port to connect.
}
// Semaphores are useful to stop a Task proceeding, where it should be paused to wait,
// because it is sharing a resource, such as the Serial port.
// Semaphores should only be used whilst the scheduler is running, but we can set it up here.
if ( xSerialSemaphore == NULL ) // Check to confirm that the Serial Semaphore has not already been created.
{
xSerialSemaphore = xSemaphoreCreateMutex(); // Create a mutex semaphore we will use to manage the Serial Port
if ( ( xSerialSemaphore ) != NULL )
xSemaphoreGive( ( xSerialSemaphore ) ); // Make the Serial Port available for use, by "Giving" the Semaphore.
}
// Now set up two Tasks to run independently.
xTaskCreate(
TaskDigitalRead
, (const portCHAR *)"DigitalRead" // A name just for humans
, 128 // This stack size can be checked & adjusted by reading the Stack Highwater
, NULL
, 2 // Priority, with 3 (configMAX_PRIORITIES - 1) being the highest, and 0 being the lowest.
, NULL );
xTaskCreate(
TaskAnalogRead
, (const portCHAR *) "AnalogRead"
, 128 // Stack size
, NULL
, 1 // Priority
, NULL );
// Now the Task scheduler, which takes over control of scheduling individual Tasks, is automatically started.
}
void loop()
{
// Empty. Things are done in Tasks.
}
/*--------------------------------------------------*/
/*---------------------- Tasks ---------------------*/
/*--------------------------------------------------*/
void TaskDigitalRead( void *pvParameters __attribute__((unused)) ) // This is a Task.
{
/*
DigitalReadSerial
Reads a digital input on pin 2, prints the result to the serial monitor
This example code is in the public domain.
*/
// digital pin 2 has a pushbutton attached to it. Give it a name:
uint8_t pushButton = I0_0;
// make the pushbutton's pin an input:
pinMode(pushButton, INPUT);
for (;;) // A Task shall never return or exit.
{
// read the input pin:
int buttonState = digitalRead(pushButton);
// See if we can obtain or "Take" the Serial Semaphore.
// If the semaphore is not available, wait 5 ticks of the Scheduler to see if it becomes free.
if ( xSemaphoreTake( xSerialSemaphore, ( TickType_t ) 5 ) == pdTRUE )
{
// We were able to obtain or "Take" the semaphore and can now access the shared resource.
// We want to have the Serial Port for us alone, as it takes some time to print,
// so we don't want it getting stolen during the middle of a conversion.
// print out the state of the button:
Serial.println(buttonState);
xSemaphoreGive( xSerialSemaphore ); // Now free or "Give" the Serial Port for others.
}
vTaskDelay(1); // one tick delay (15ms) in between reads for stability
}
}
void TaskAnalogRead( void *pvParameters __attribute__((unused)) ) // This is a Task.
{
for (;;)
{
// read the input on analog pin 0:
int sensorValue = analogRead(I0_1);
// See if we can obtain or "Take" the Serial Semaphore.
// If the semaphore is not available, wait 5 ticks of the Scheduler to see if it becomes free.
if ( xSemaphoreTake( xSerialSemaphore, ( TickType_t ) 5 ) == pdTRUE )
{
// We were able to obtain or "Take" the semaphore and can now access the shared resource.
// We want to have the Serial Port for us alone, as it takes some time to print,
// so we don't want it getting stolen during the middle of a conversion.
// print out the value you read:
Serial.println(sensorValue);
xSemaphoreGive( xSerialSemaphore ); // Now free or "Give" the Serial Port for others.
}
vTaskDelay(1); // one tick delay (15ms) in between reads for stability
}
}

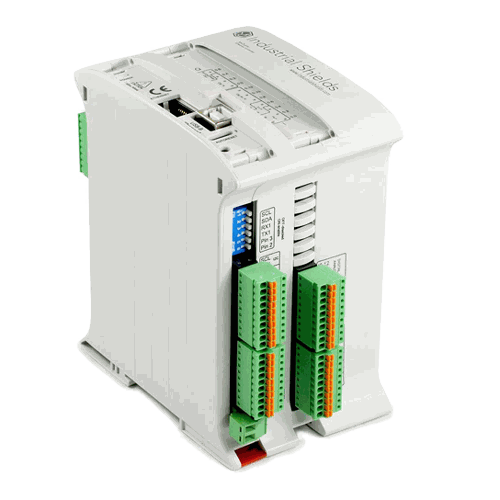
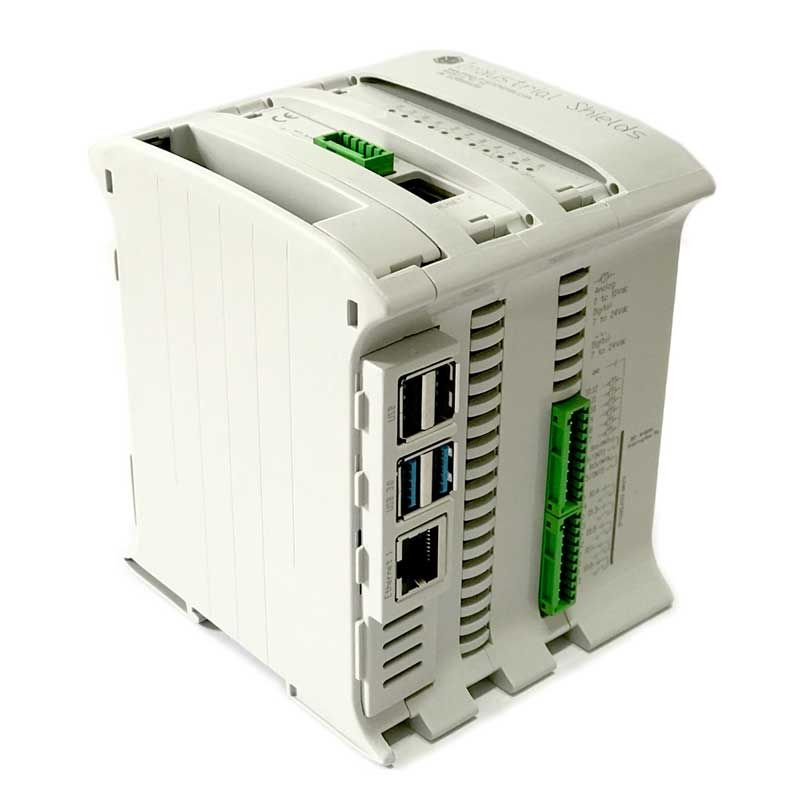
FreeRTOS para realizar múltiples tareas con un PLC basado en Arduino